Hey there… what a frickin’ year right?
I hope everyone is staying safe during this crazy time! As you all know, there has been a high demand for face masks in the recent weeks due to the COVID-19 (Coronavirus) pandemic across the world. Many makers have been using their fiber skills to create reusable masks to protect themselves and their loved ones.
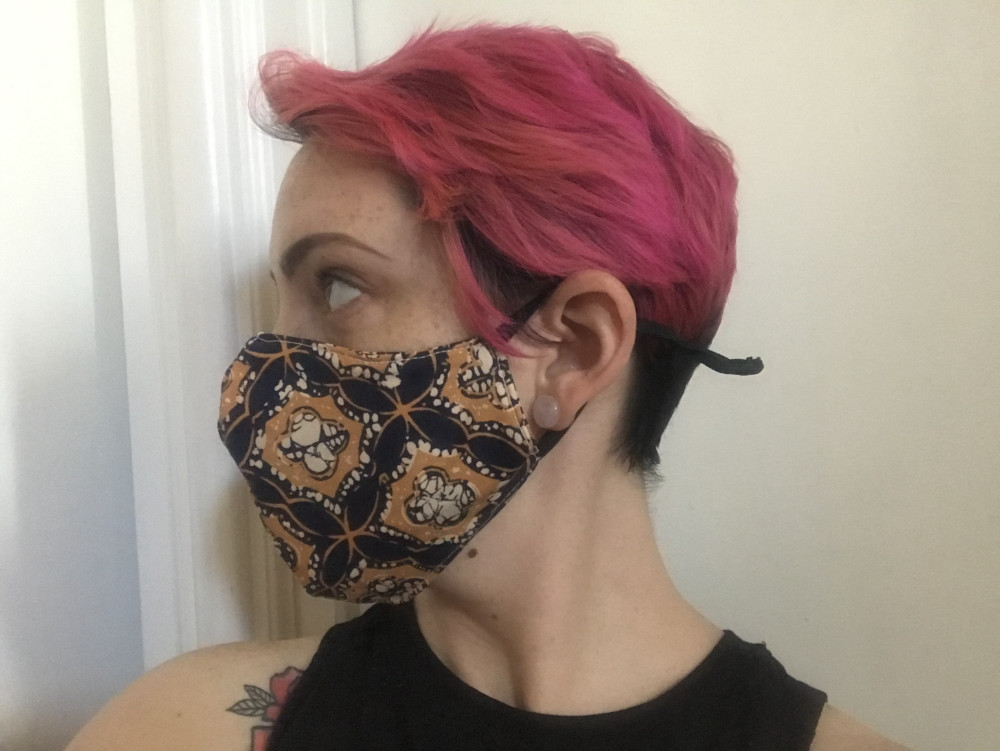
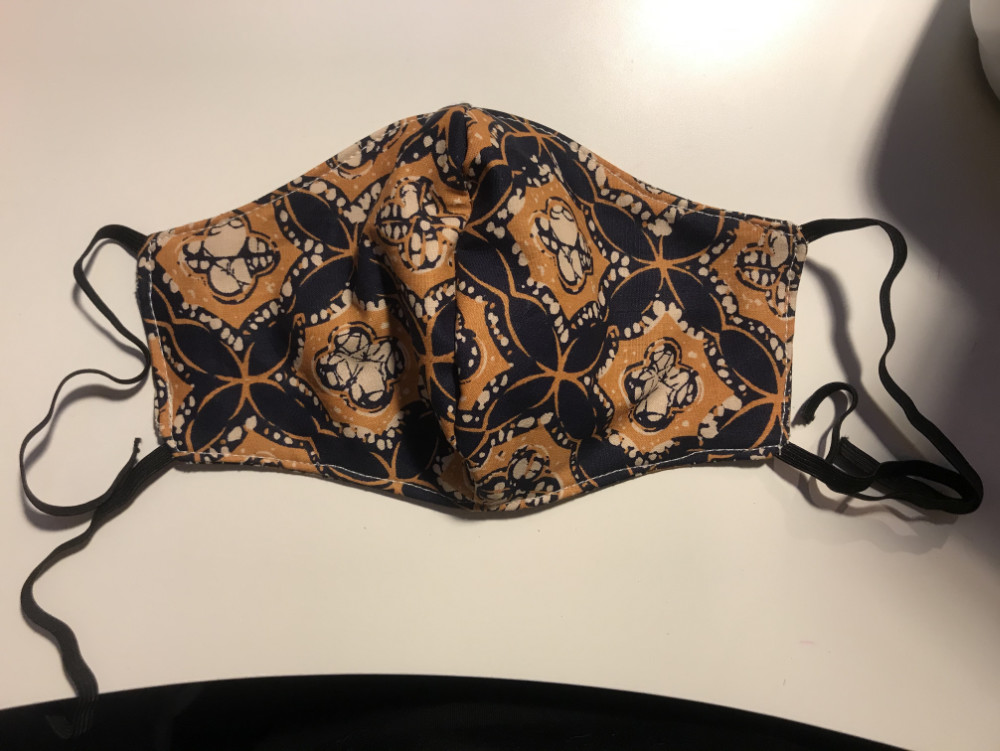
I tried a lot of the simple patterns that have been going around Facebook and Pinterest, but none of them were quite what I felt comfortable wearing out in public. I decided to take a crack at making my own version, this one being more fitted, and adjustable for most sizes. This was based off a store bought mask I had gotten off of Amazon a few years ago.
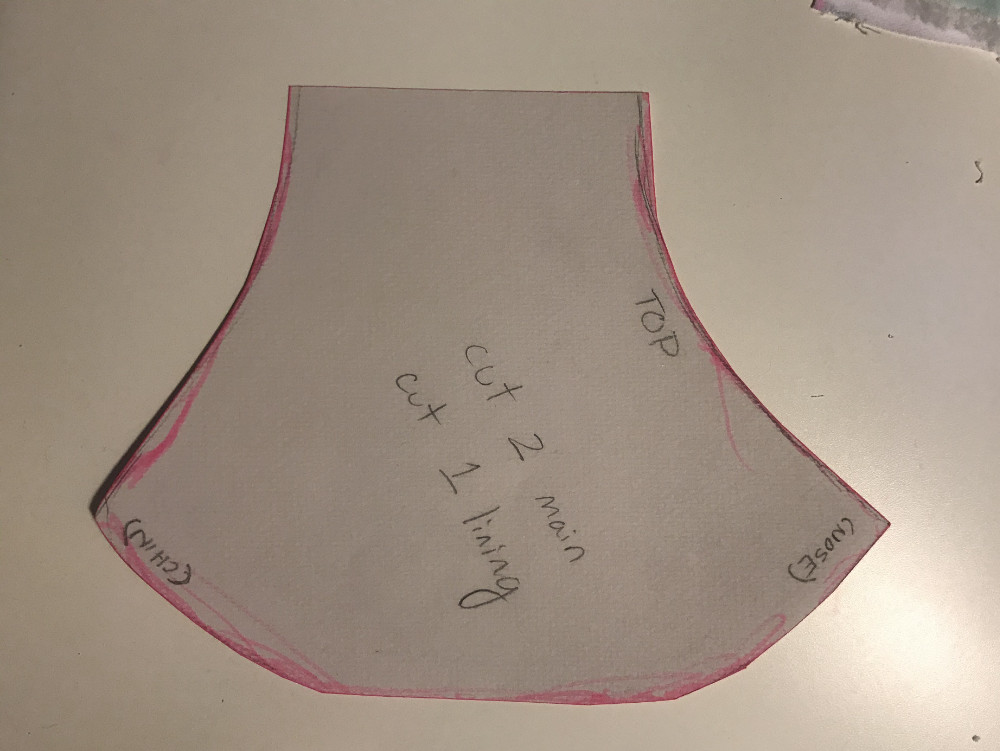
There are 3 sizes available, and photos for each step in this post. You can also download a PDF to print and cut the pattern!
Let’s get started:
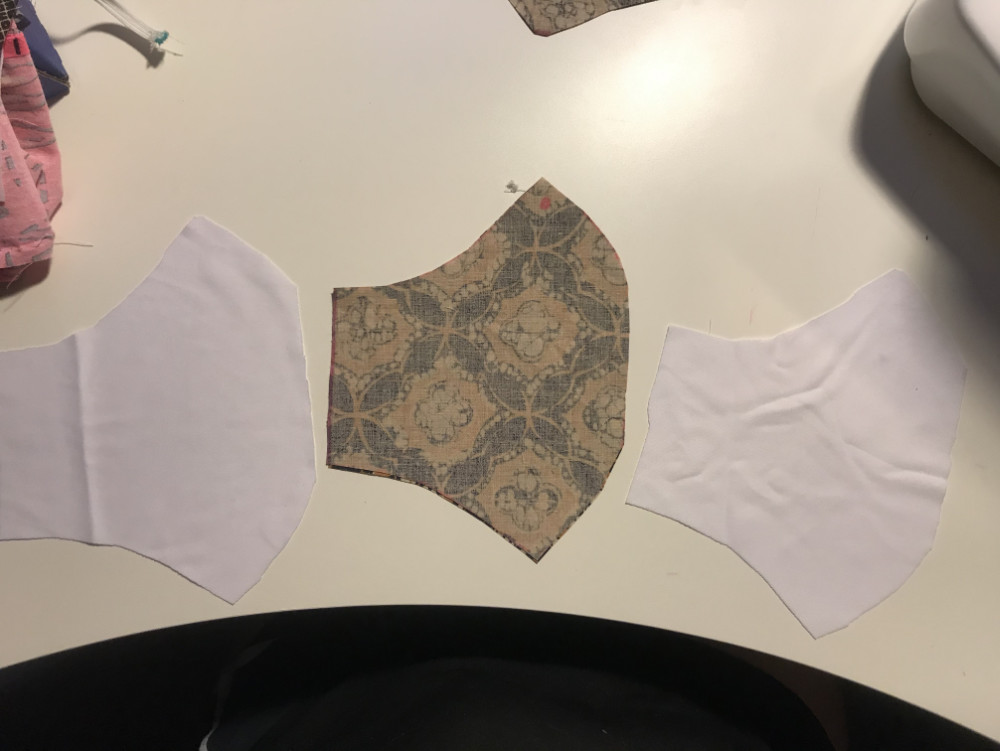
1. Cut out your desired pattern size. I’m using the size Medium pattern piece here in the example.
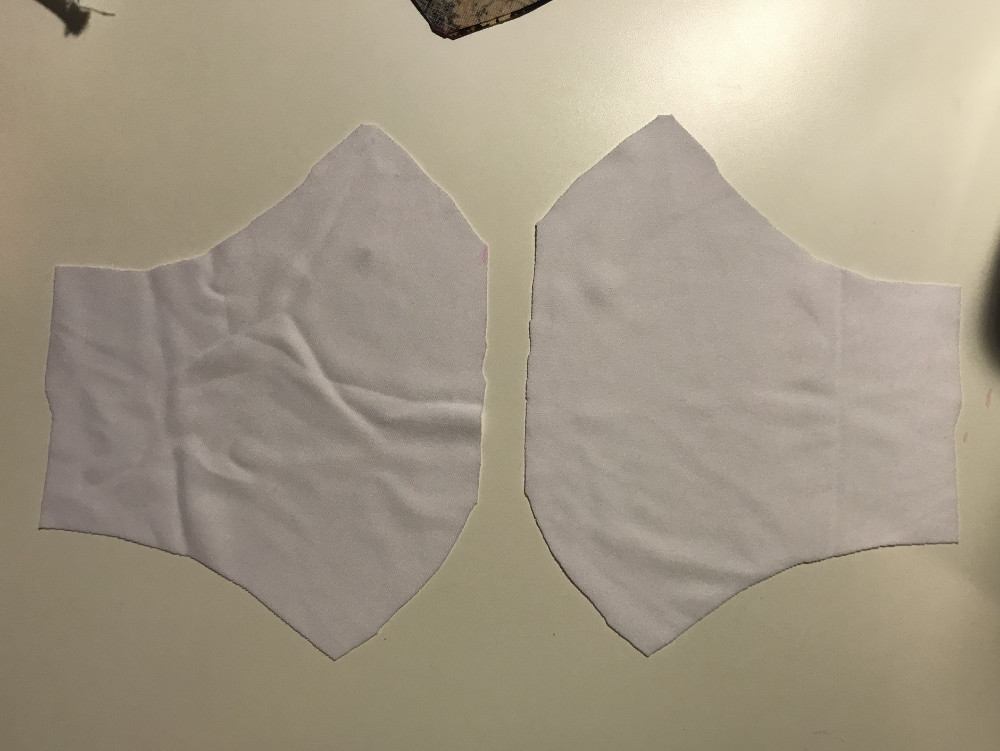
 2. Cut 4 pieces of the main fabric, and 2 pieces of the lining fabric. Main fabric should be traced and cut as 2 layers, right sides facing.

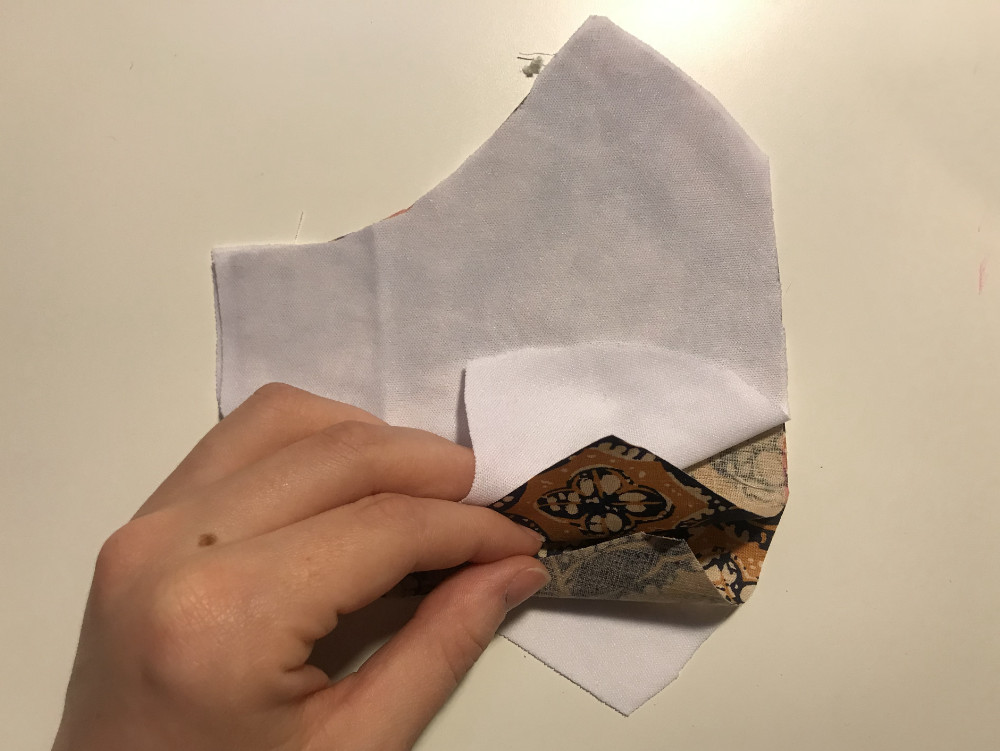
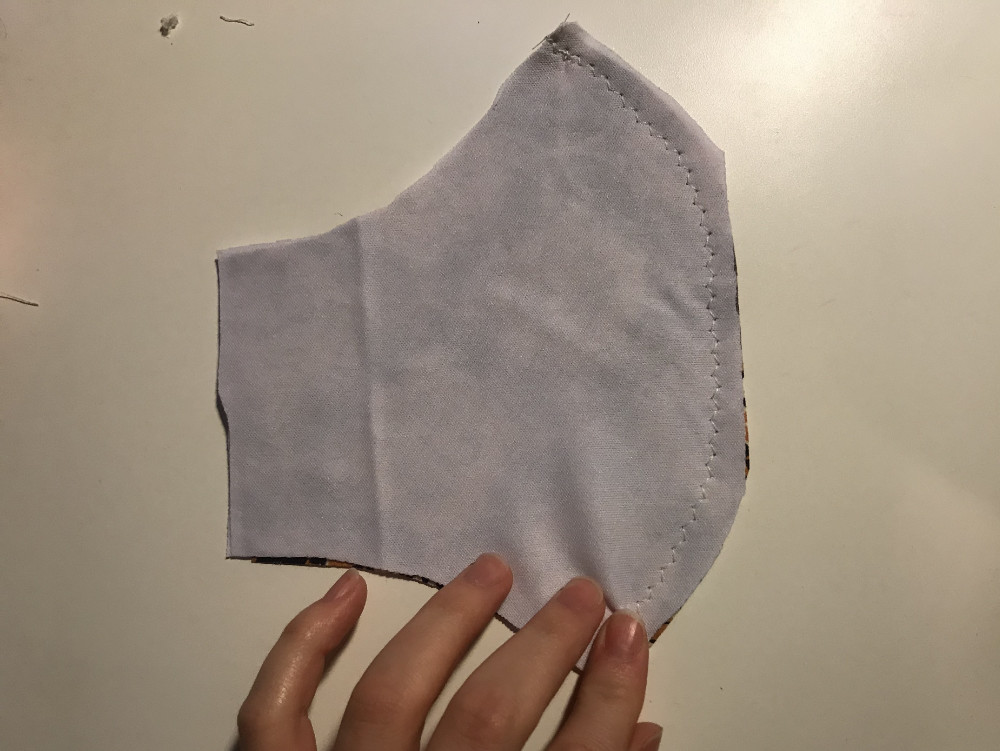
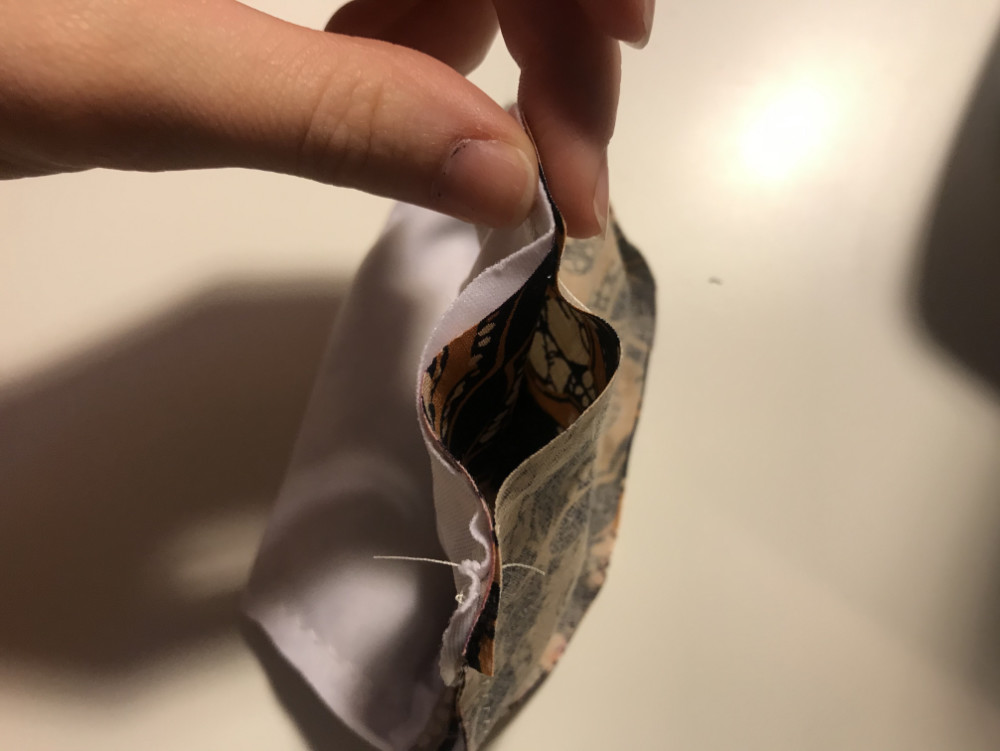
 3. Sandwich 2 of the main fabric pieces in between both lining pieces, then sew along the curved front edge.

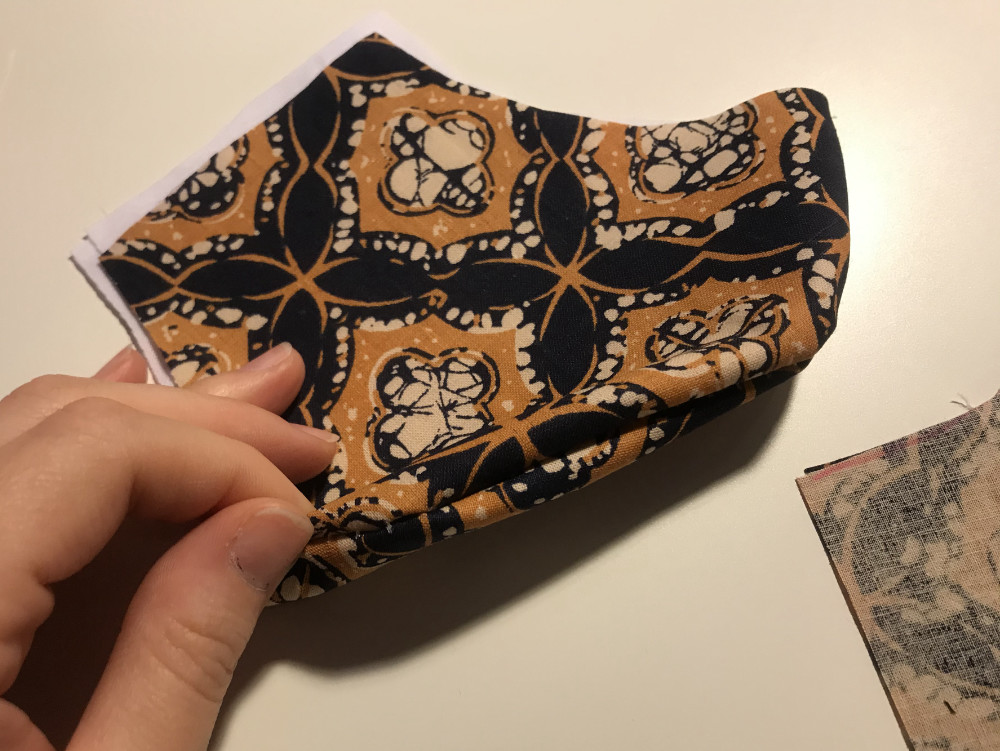
4. Sew the other 2 of the main fabric pieces together, right sides facing, along the curved front edge, the same way.
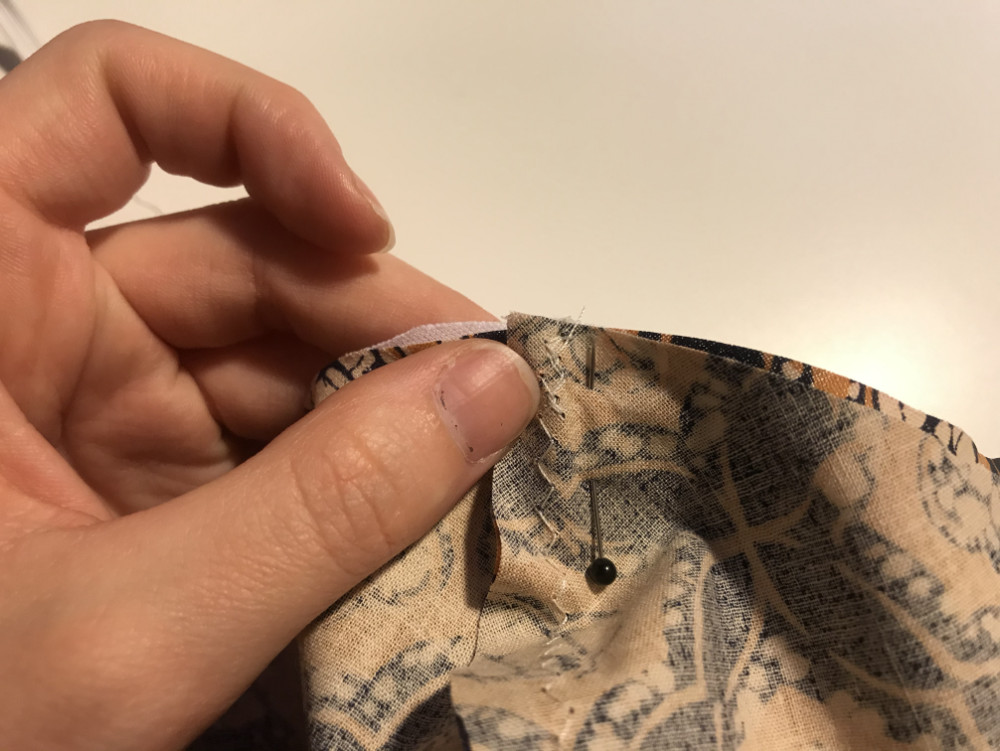
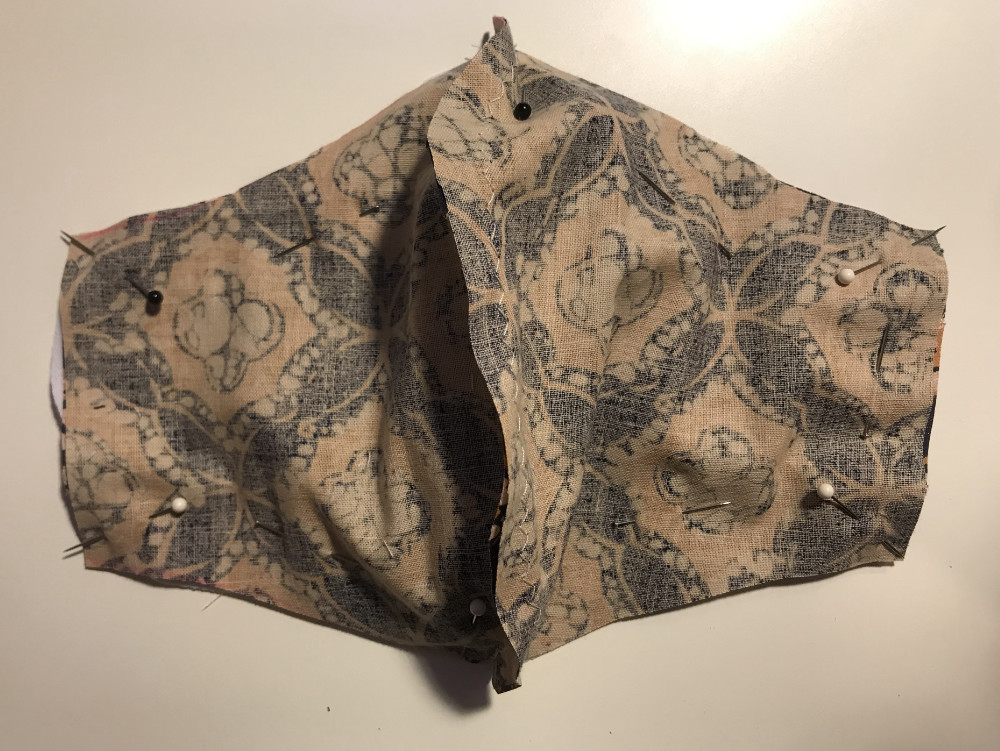
 5. Open both halves of the mask, align right sides facing and pin at the nose and chin seams.
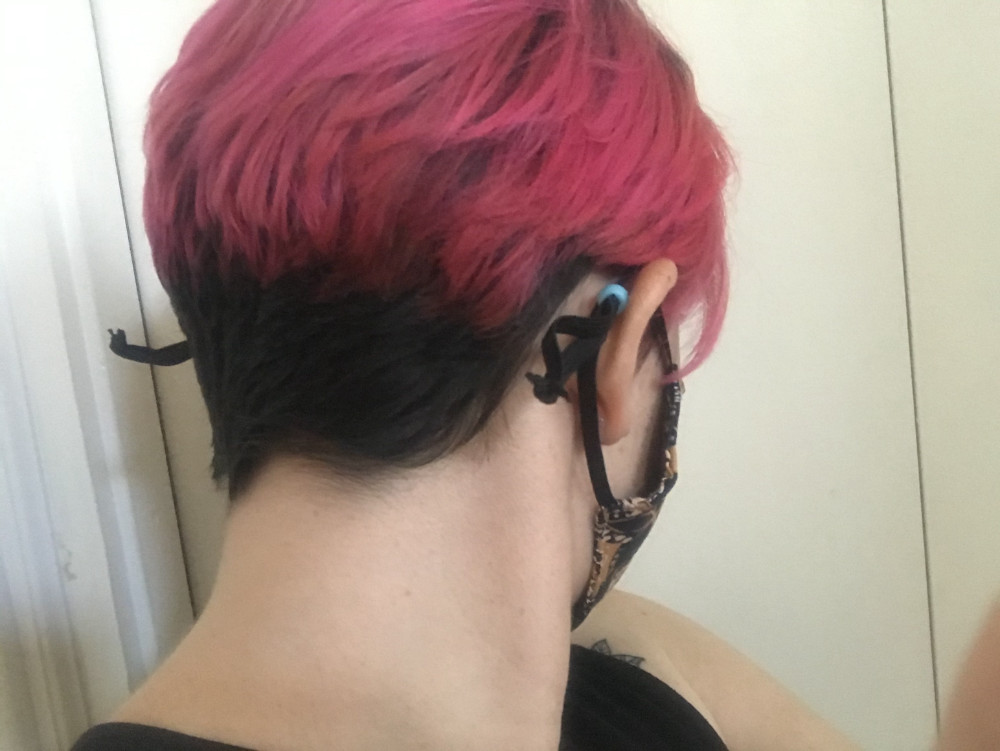
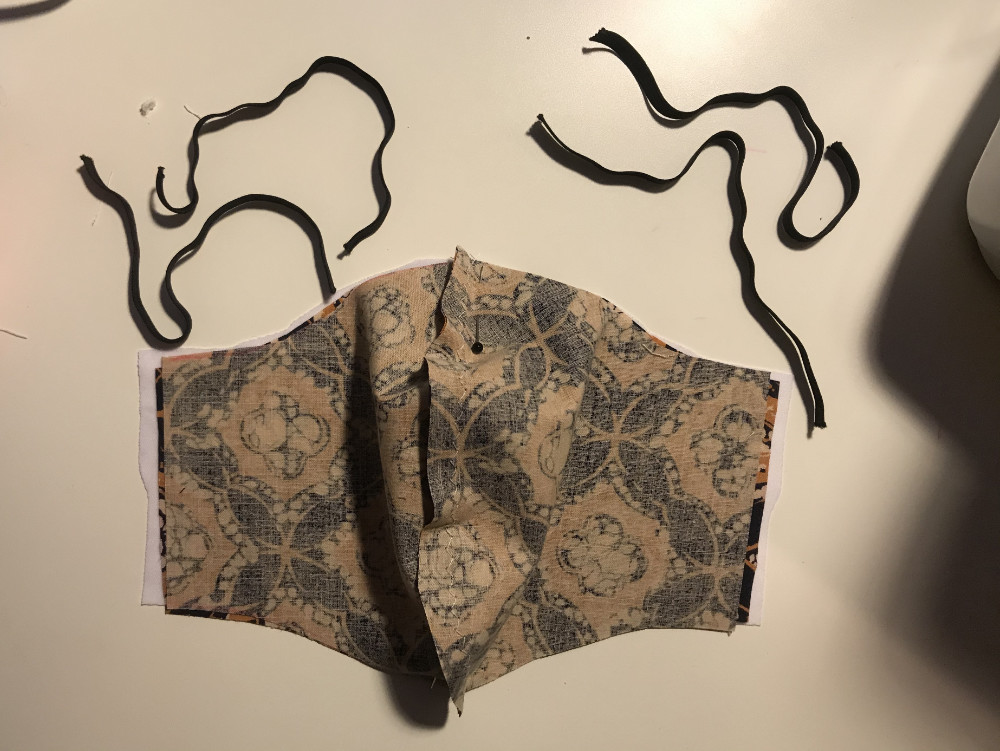
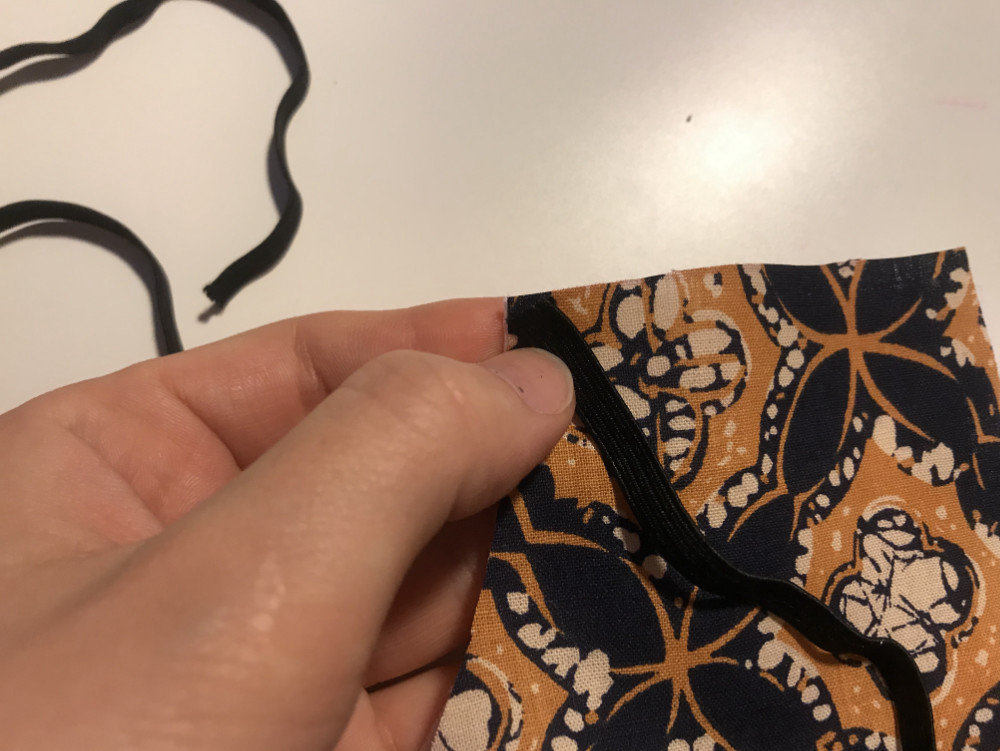
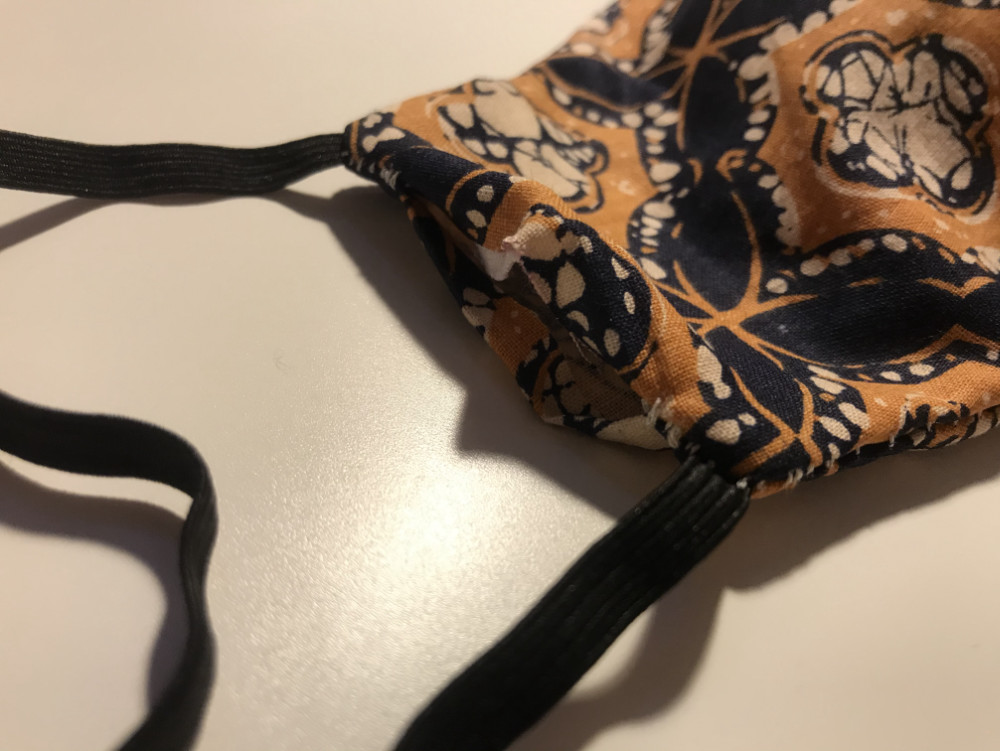
6. Cut 4 strips of 1/8 in elastic and pin each piece to each corner with the elastics inside the “pocket” of fabric.
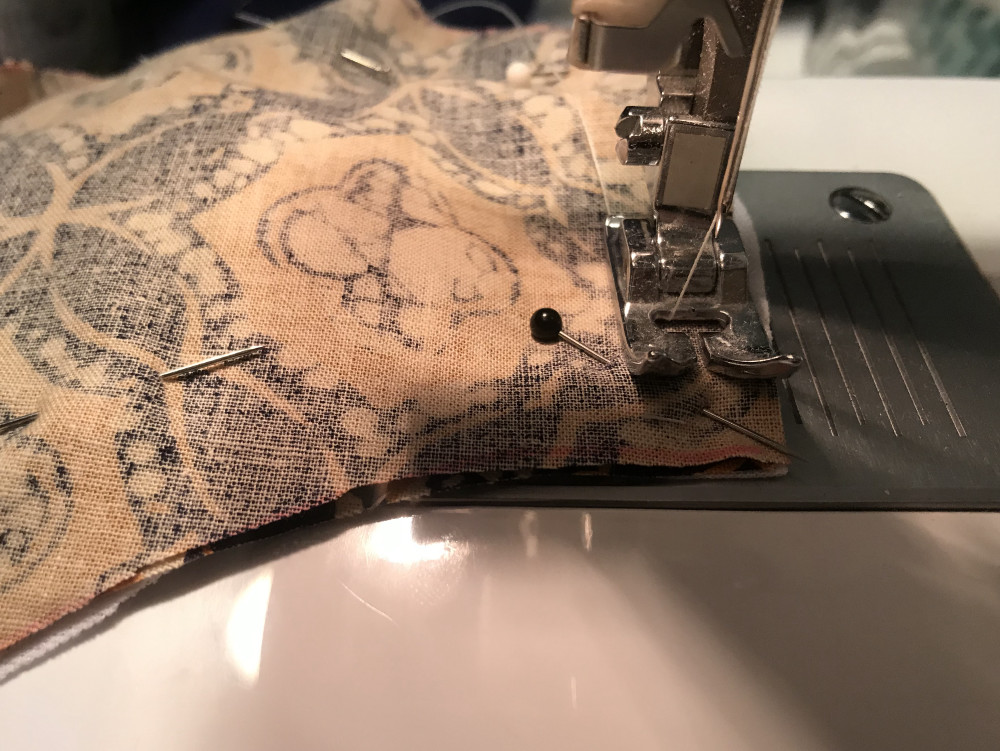
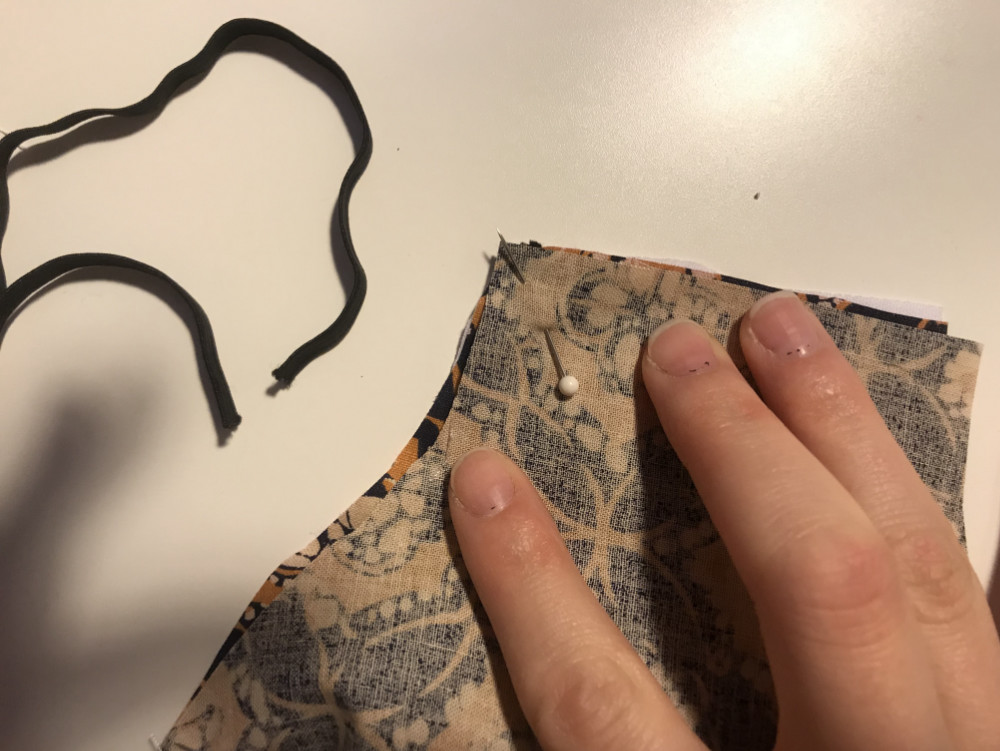 7. Secure the edges with pins, then sew around the entire edge of the mask, leaving a 2 in gap on one of the flat sides. (Backstitch a few times over each corner to secure elastics)
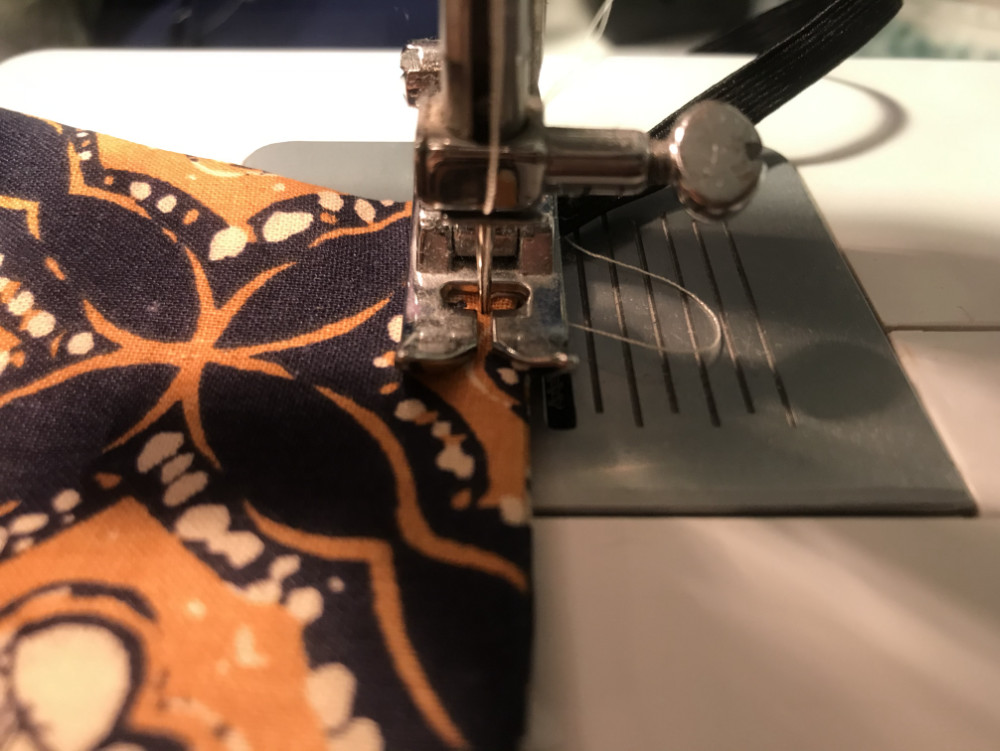
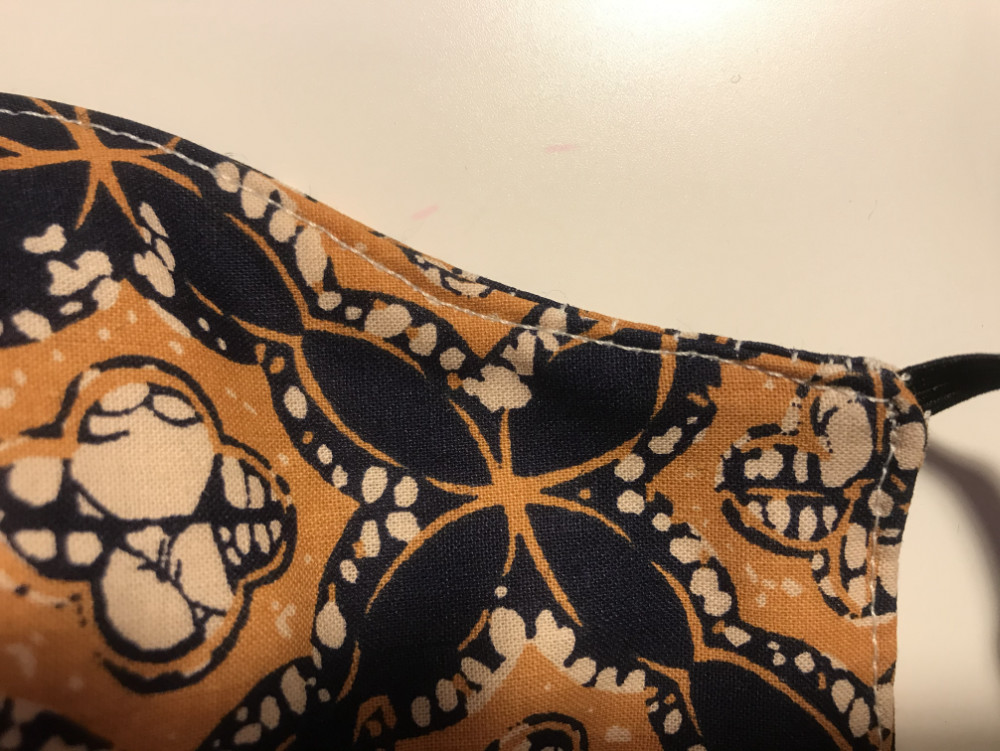
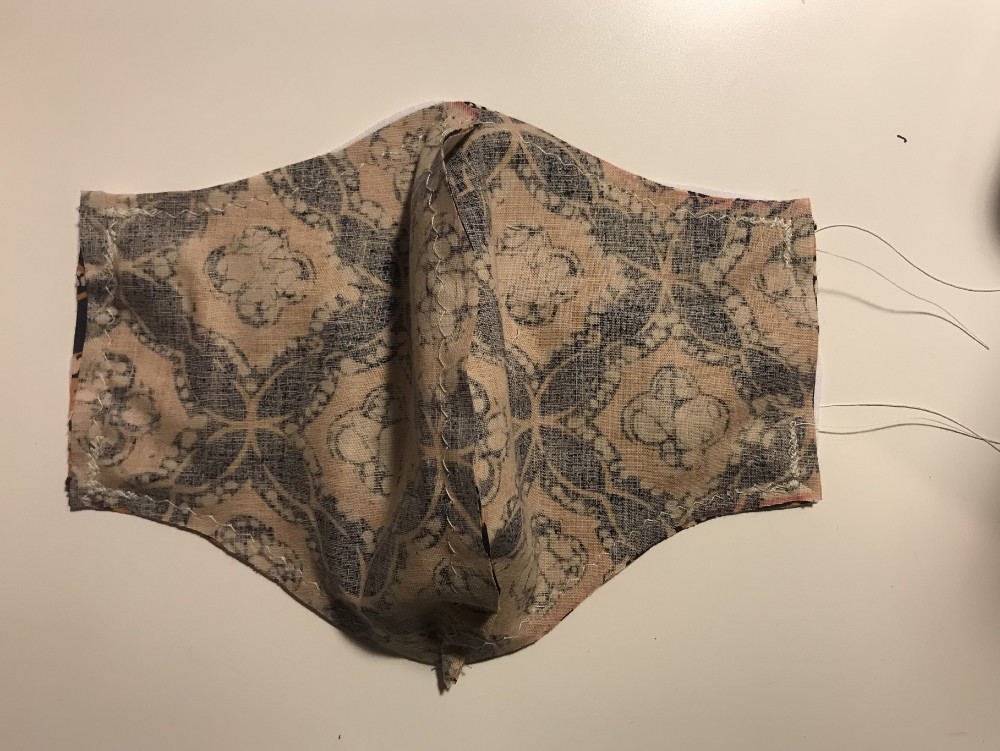 8. Flip your mask right side out. Tuck the open edges of the gap, then sew a tight edge seam along the entire edge of the mask to finish.
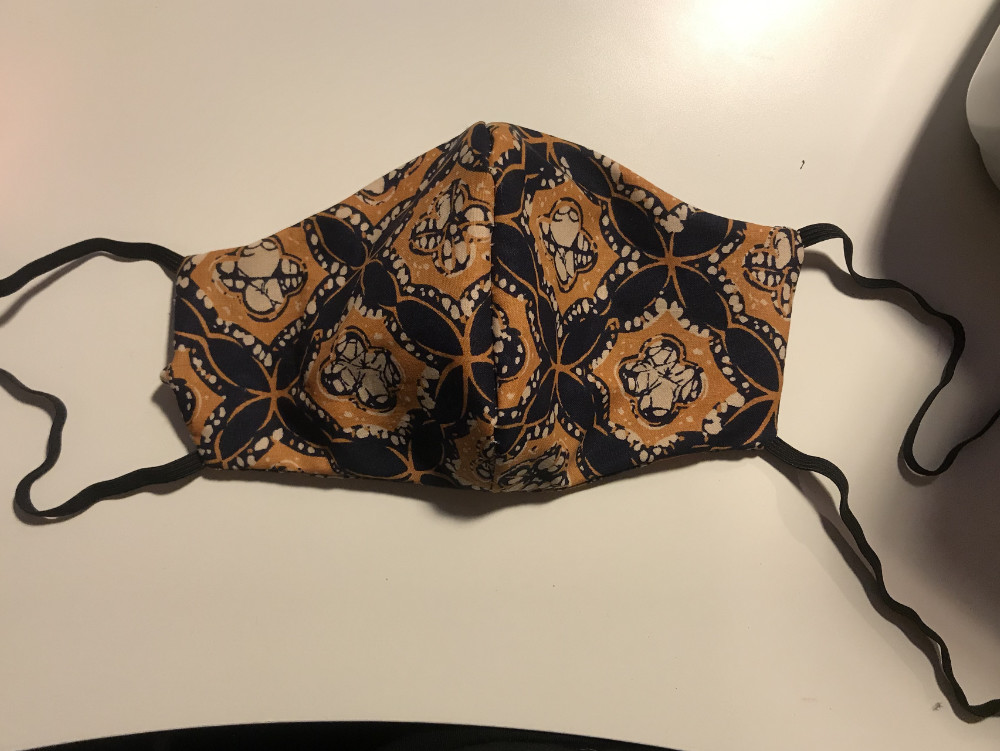
9. Thread the elastics through a bead on each side. Tie the elastics together in a knot, trim excess. This makes the loops adjustable.
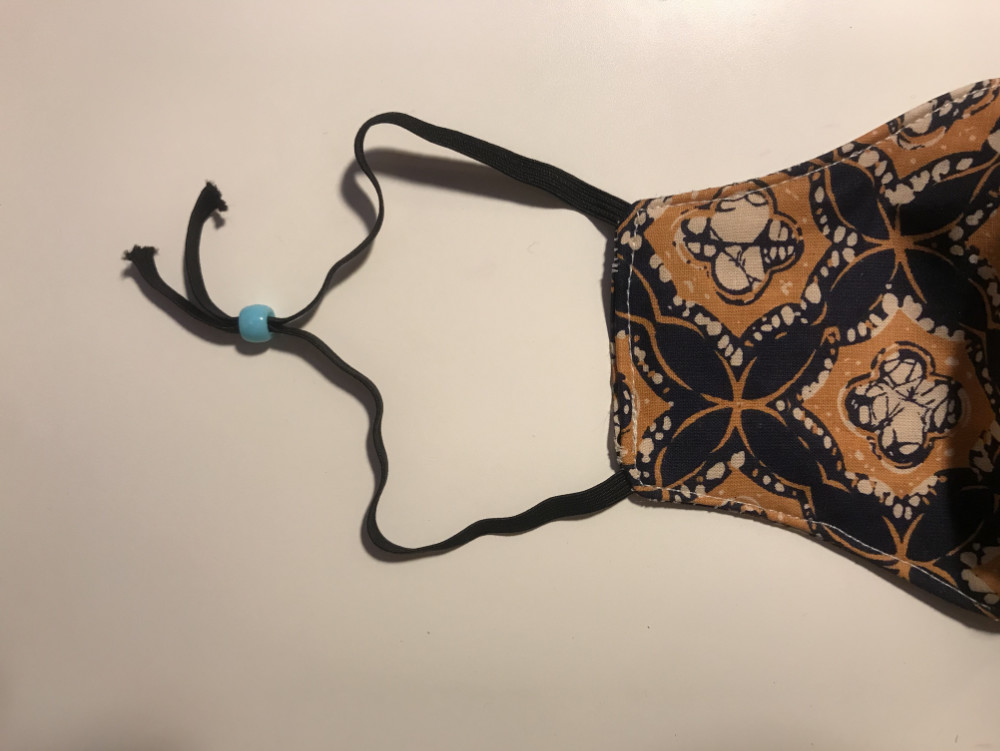

All Done! Adjust your straps to fit on your face by sliding the bead down once it’s on your ears.
Stay safe everyone!