


One of the most popular (and seemingly essential) parts of a girl’s wardrobe, nowadays, is the skater dress. This simplistic casual dress can be paired with a variety of styles such as a leather jacket, a basic cardigan, sandals, boots, scarves, the list goes on! And while skater dresses come in a variety of fabrics and styles, there are some general characteristics that define them:
- Skirt hits above the knee
- Skirt is semi-full or circular
- Top is fitted like a t-shirt or tank top
- Most commonly made with a stretchy knit fabric
I’ve seen a lot of unique versions of the skater dress, such as this velvet one from Forever 21. I also have many examples of some cute ones in this blog post I wrote a while ago. I’ve seen skater dresses with cutouts, quirky printed fabrics and even embellishments like a Peter Pan collar or ruffles. But the fact remains that they are quickly becoming a versatile staple of any fashionable girl’s wardrobe, simply because they go with any accessory or style.
My closet currently contains 2 skater dresses. That clearly isn’t enough, so I decided to try my hand at making one for myself. That would be cool, but what if I want more after I make that one? Simple solution: I made a pattern to go with it. Why does this all matter to you? Well, because I’m going to show you how to make yourself one!
Making The Skater Dress Pattern
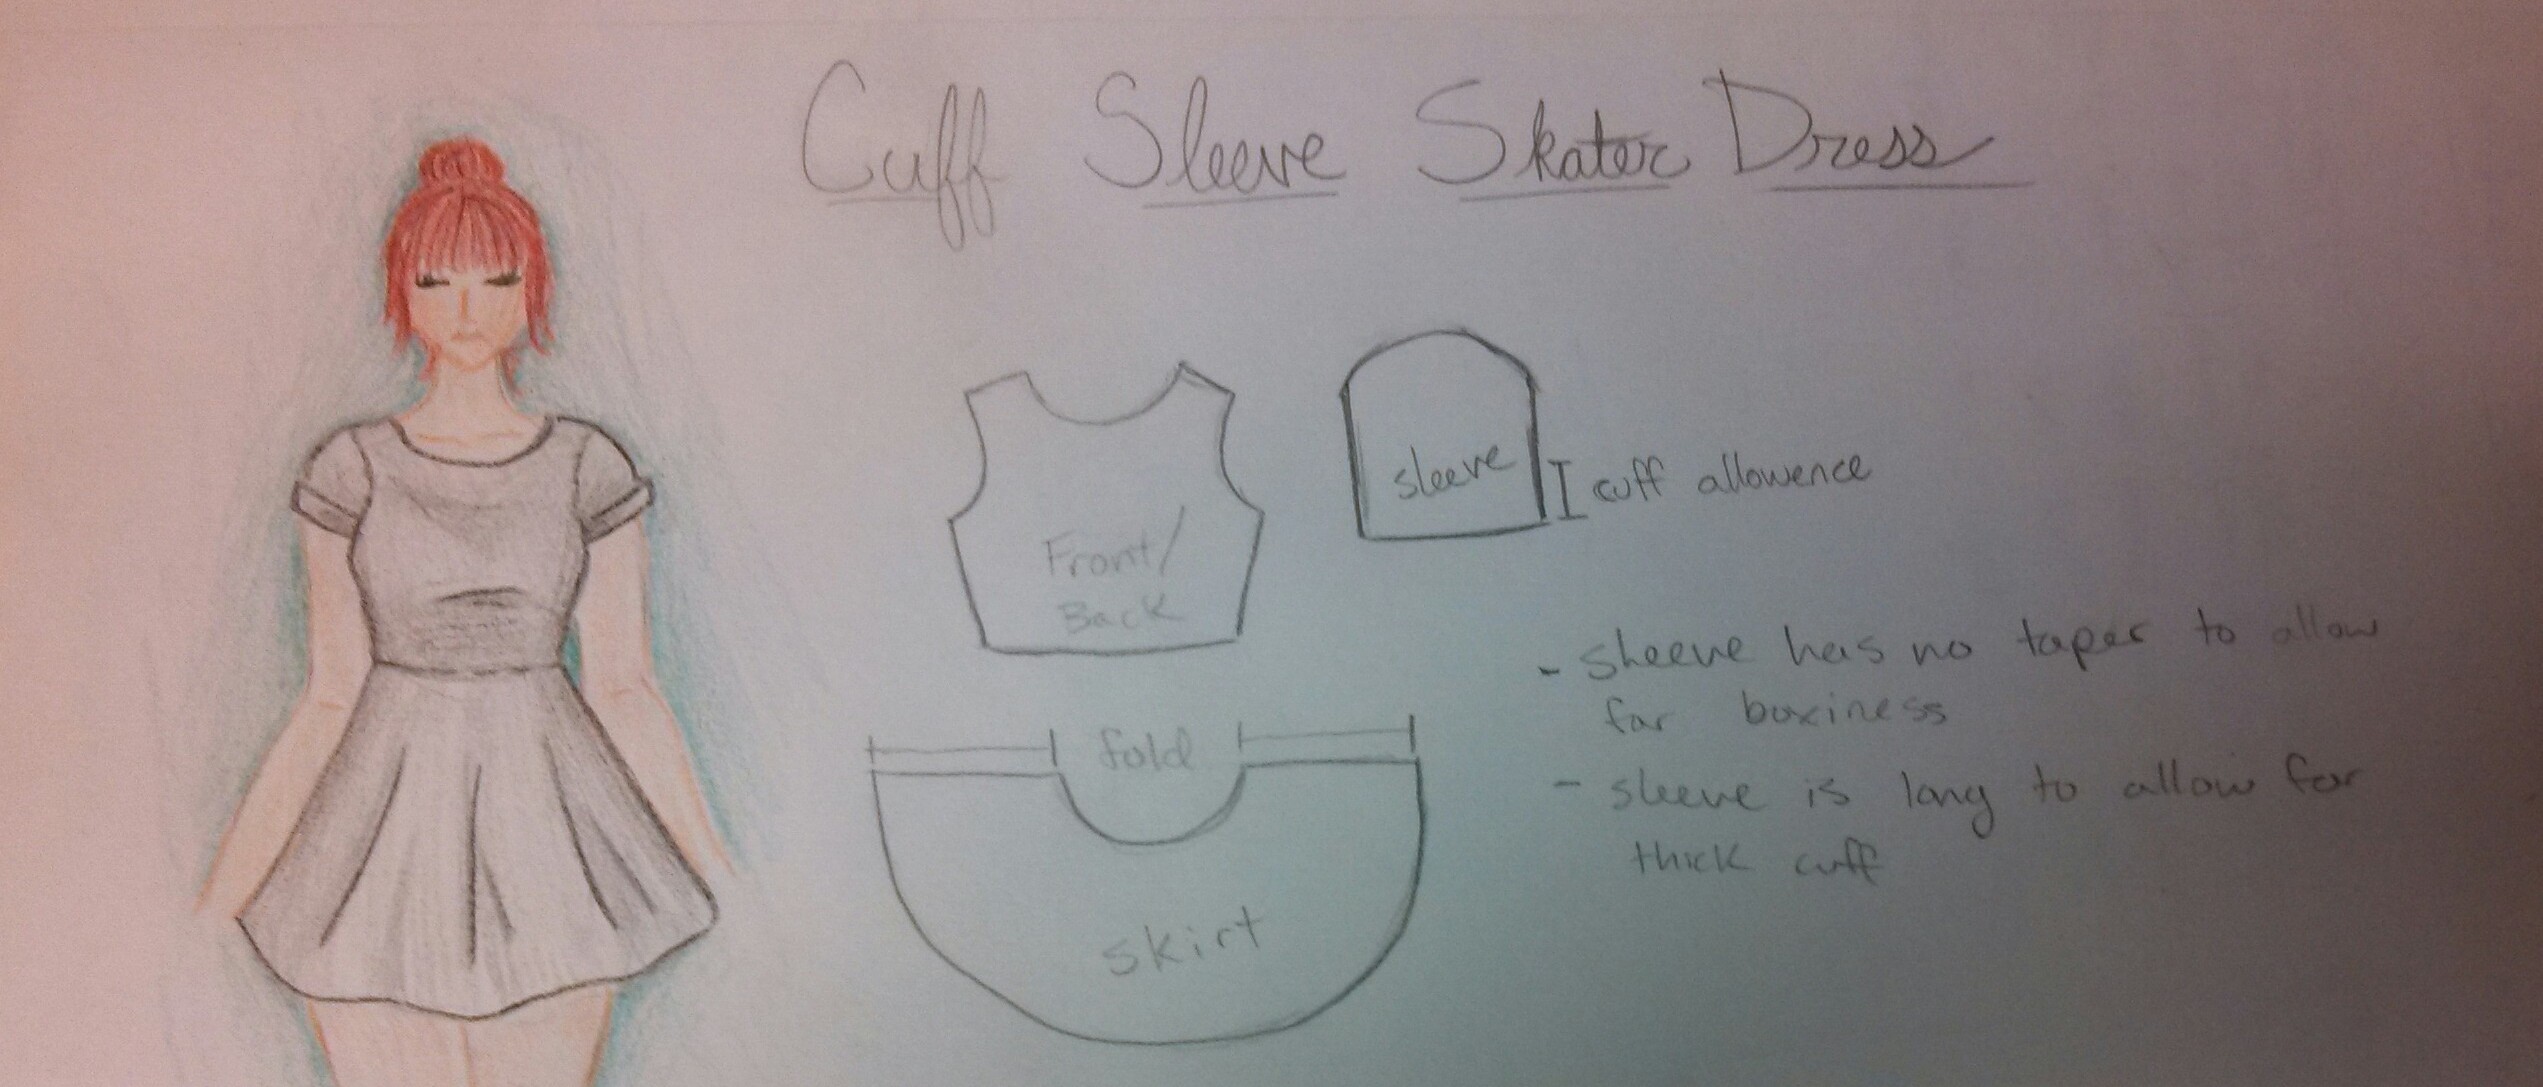
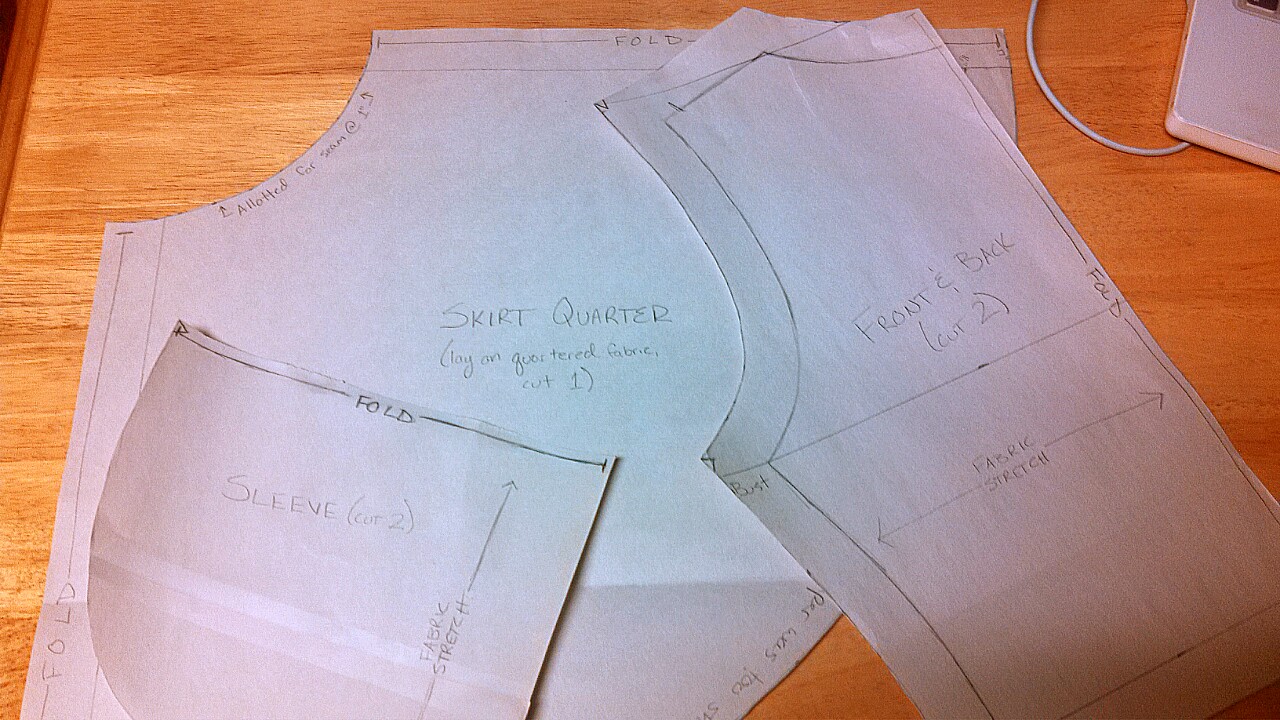
Part 1 of this tutorial is going to be making your own skater dress pattern. If you’d like to skip this part and see the sewing, please stay tuned for part 2! The way I looked at constructing the skater dress is that it’s a circle skirt attached to a crop top. Skater skirts typically come up to your belly button, which is where crop tops also come down to. By attaching the two together, you create an a-line, full skirted dress. The pattern I created is made up of only 3 pieces. You’ll need a decent amount of material for the skirt, but the other 2 pieces are fairly small. The bodice piece is the same for the front and back.
First you need to gather some supplies:
- Paper, Muslin, or Scrap Fabric
- Writing Utensils
- Cloth Measuring Tape
- Scissors or Rotary Cutter (I strongly suggest the latter if you have it)
Some other useful things:
- Ruler & French Curves
- Fitted t-shirt or tank top (for reference/tracing)
- Clear contact paper
- Boning Tool
Step 1: Take Your Measurements
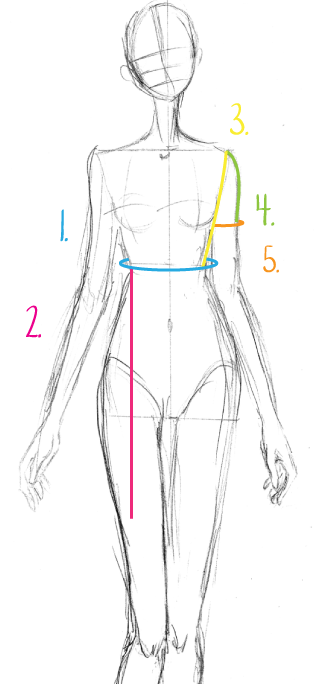
Carpenters say “measure twice, cut once” but I say “measure 3 times and you won’t feel so anxious about that one cut”. I triple check my measurements so that I’m sure it’s right. You’re going to need 5 (five) measurements for the skater dress pattern:
- Natural Waist Circumference
- Natural Waist to Mid Thigh (skirt length)
- Shoulder to Natural Waist
- Shoulder to Mid-Upper Arm (sleeve length)
- Mid-Upper Arm Circumference
Write these down somewhere. The skirt length can be altered if you feel that it’s too short (or too long, if you’re feeling scandalous…) Same goes for the sleeves.
Step 2: Drafting The Pattern Pieces
Ok, now it’s time for the fun part. If you’ve never made your own pattern before, don’t be intimidated, this is my first time too! But I promise it’s not as hard as it sounds. There’s a couple ways of doing this that will make it easy as pie and you’ll be so happy you gave it a try. First of all, get your pattern material, whether it’s paper, muslin or scrap fabric, and lay it out on a big flat surface. I like to use the floor (un-carpeted, of course) so that I have a ridiculous amount of room. Make sure your paper is very flat.
2a. Bodice
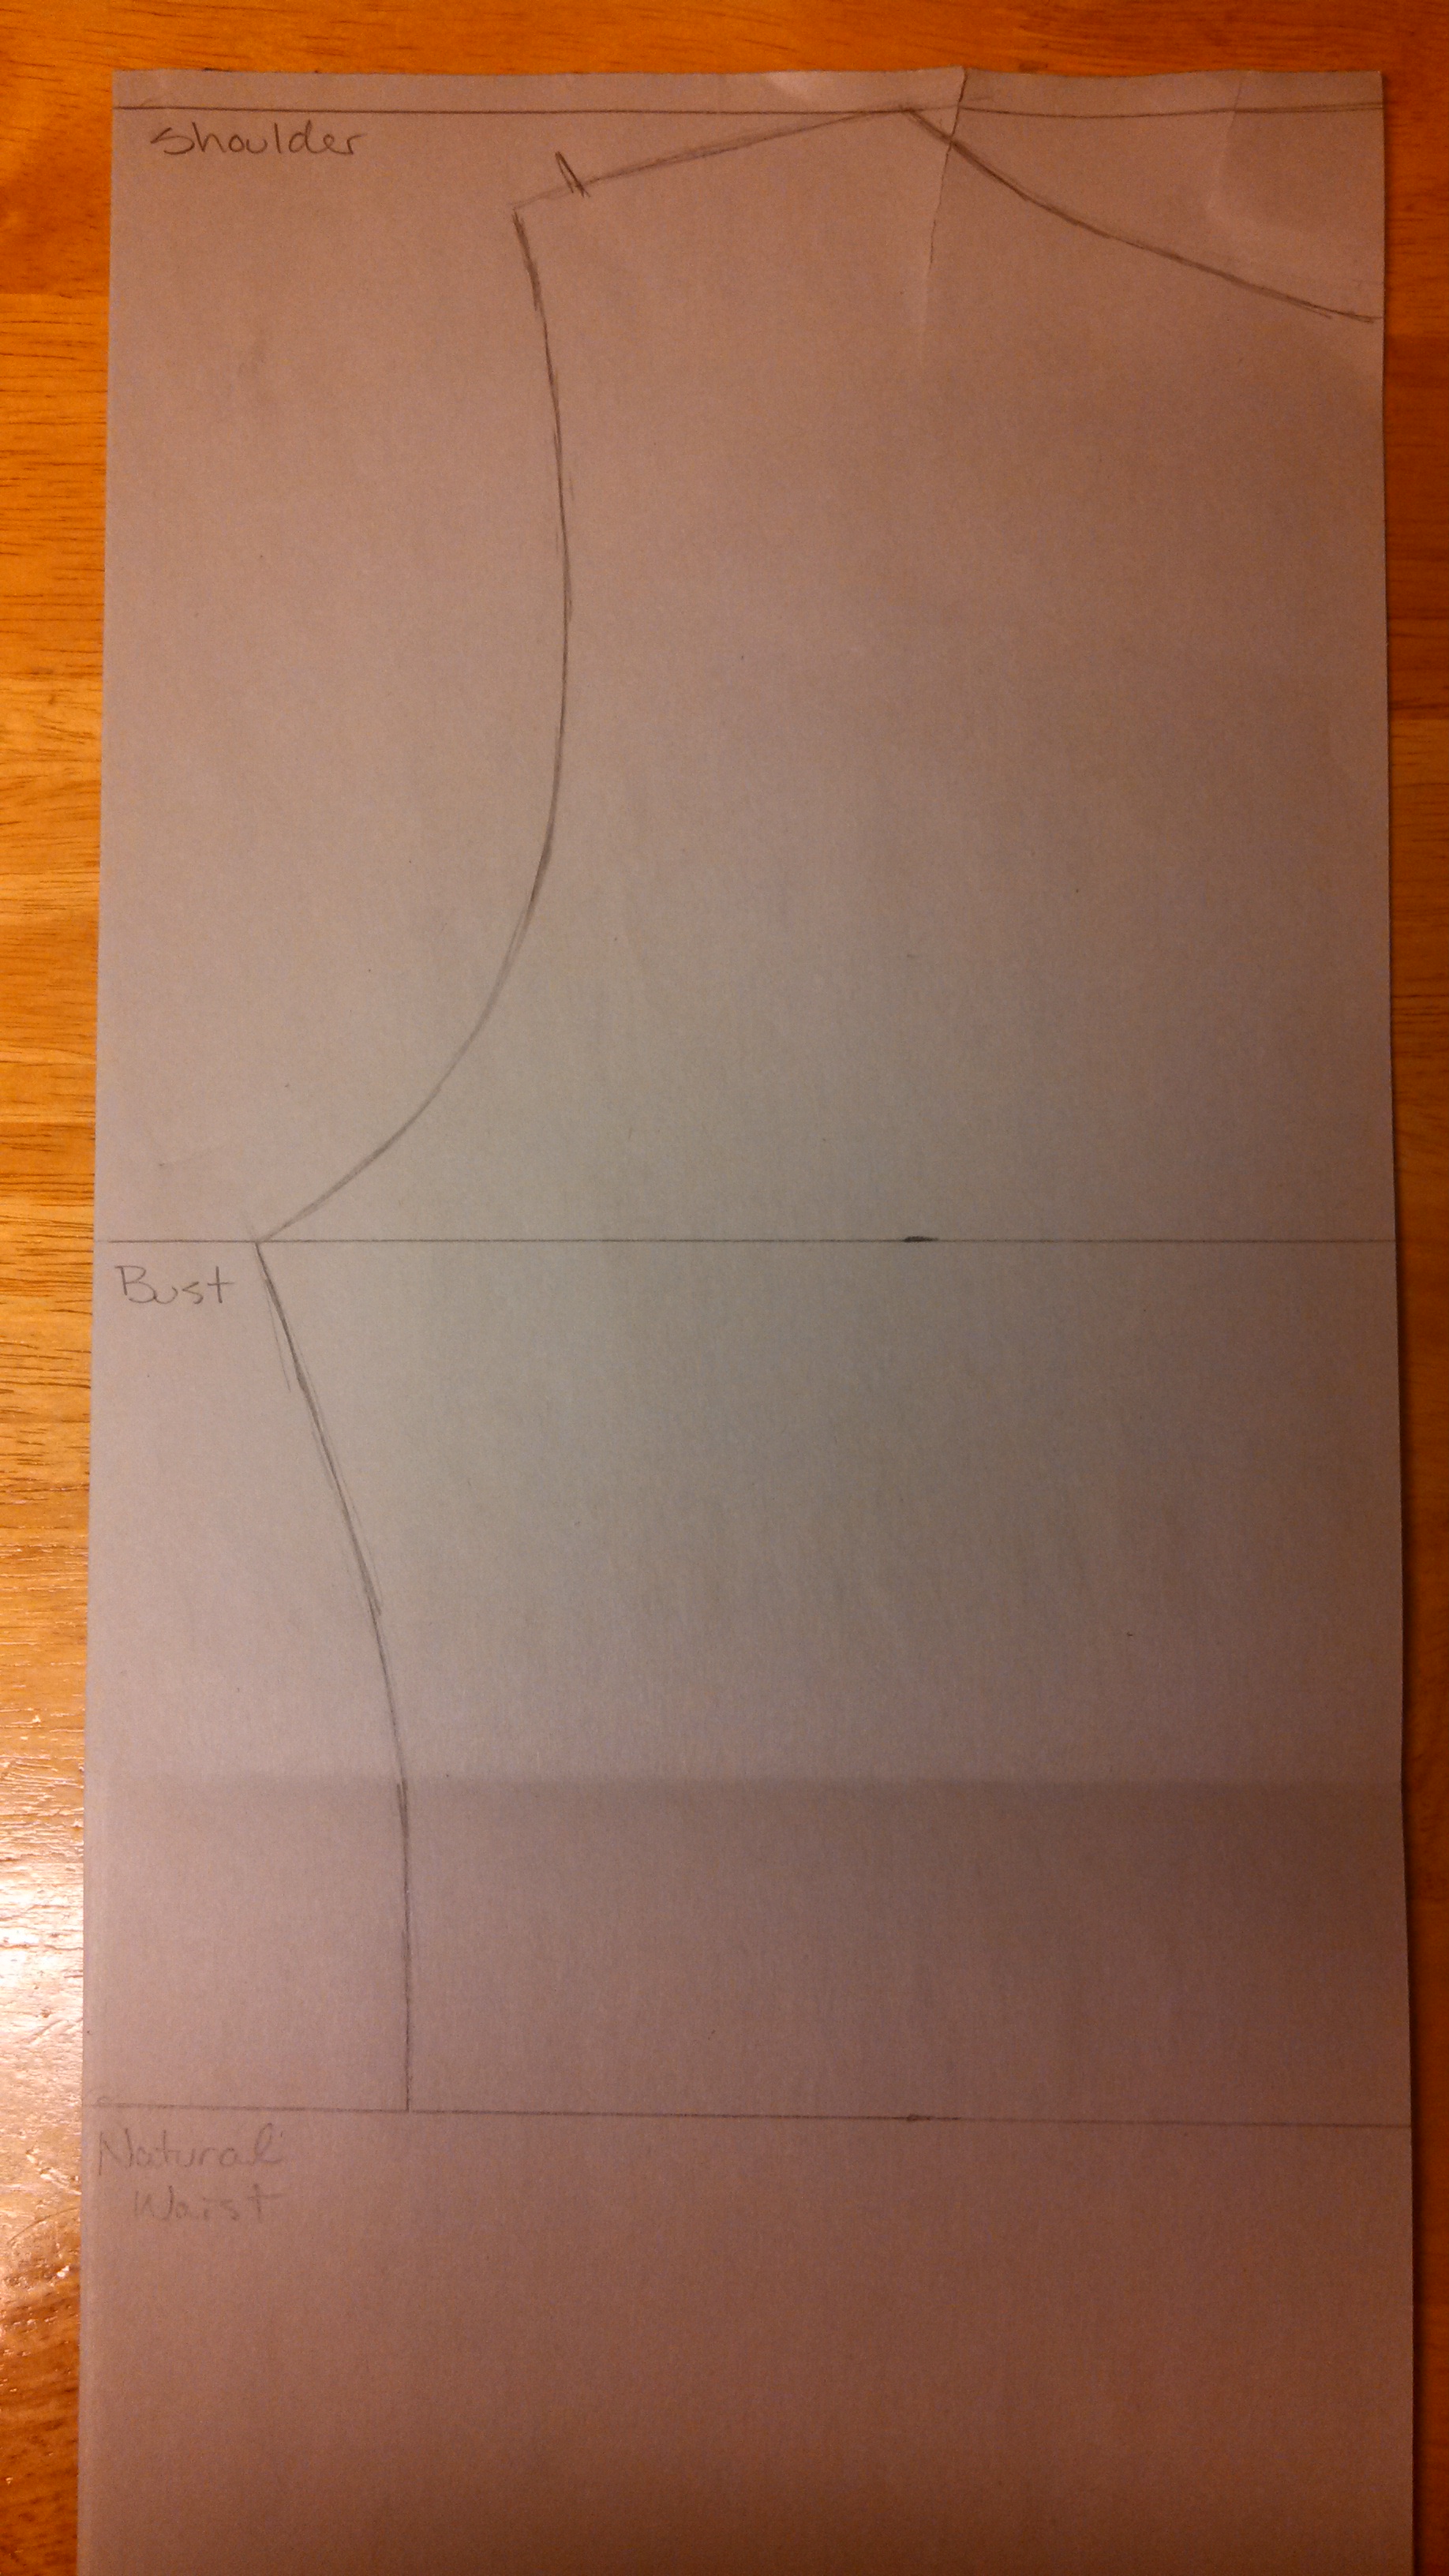
We’re going to start with the bodice pattern because you’re going to need it to draft the sleeve. I used a fitted tee to get the shape of the top. Start by folding the tee in half and lining the fold of the tee with the fold of the paper. Trace the straight line of the shoulder and also along the side seam.

Fold back the sleeve so you can only see the seam. Trace along so it matches up with the shoulder and side seams.
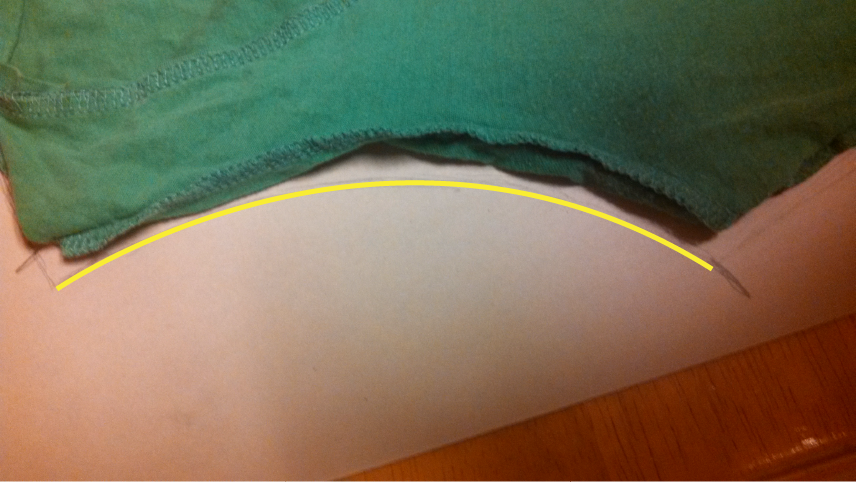
Finally trace the collar over to the paper fold.
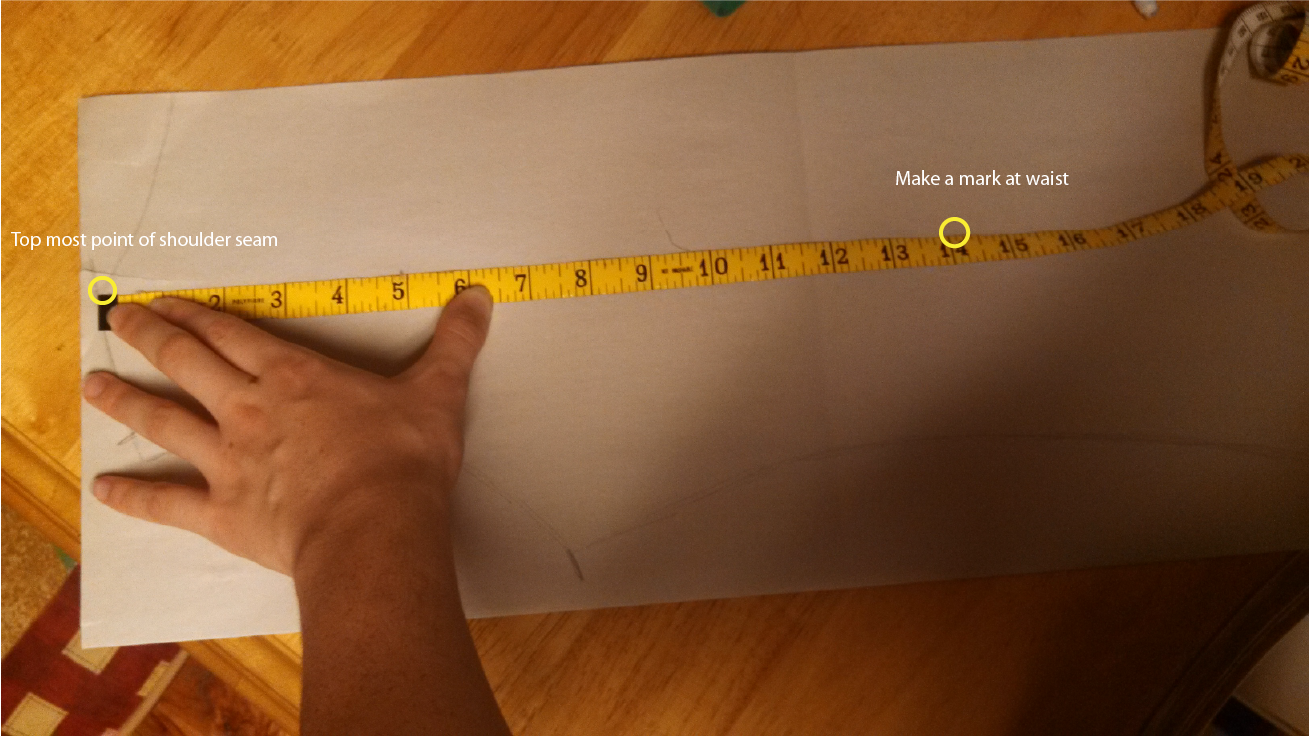
Remove the t-shirt and look back to your measurements. Starting at the top most point of the shoulder seam, lay down a ruler or measuring tape and measure parallel to the paper fold. Make a mark at the measurement you got for your Shoulder to Waist. Make a horizontal line for the waistline.
(That 3rd line on my pattern was one that I later deemed unnecessary because it was originally used to draft a pattern from scratch. That didn’t work out so I decided to cheat with tracing the t-shirt.)
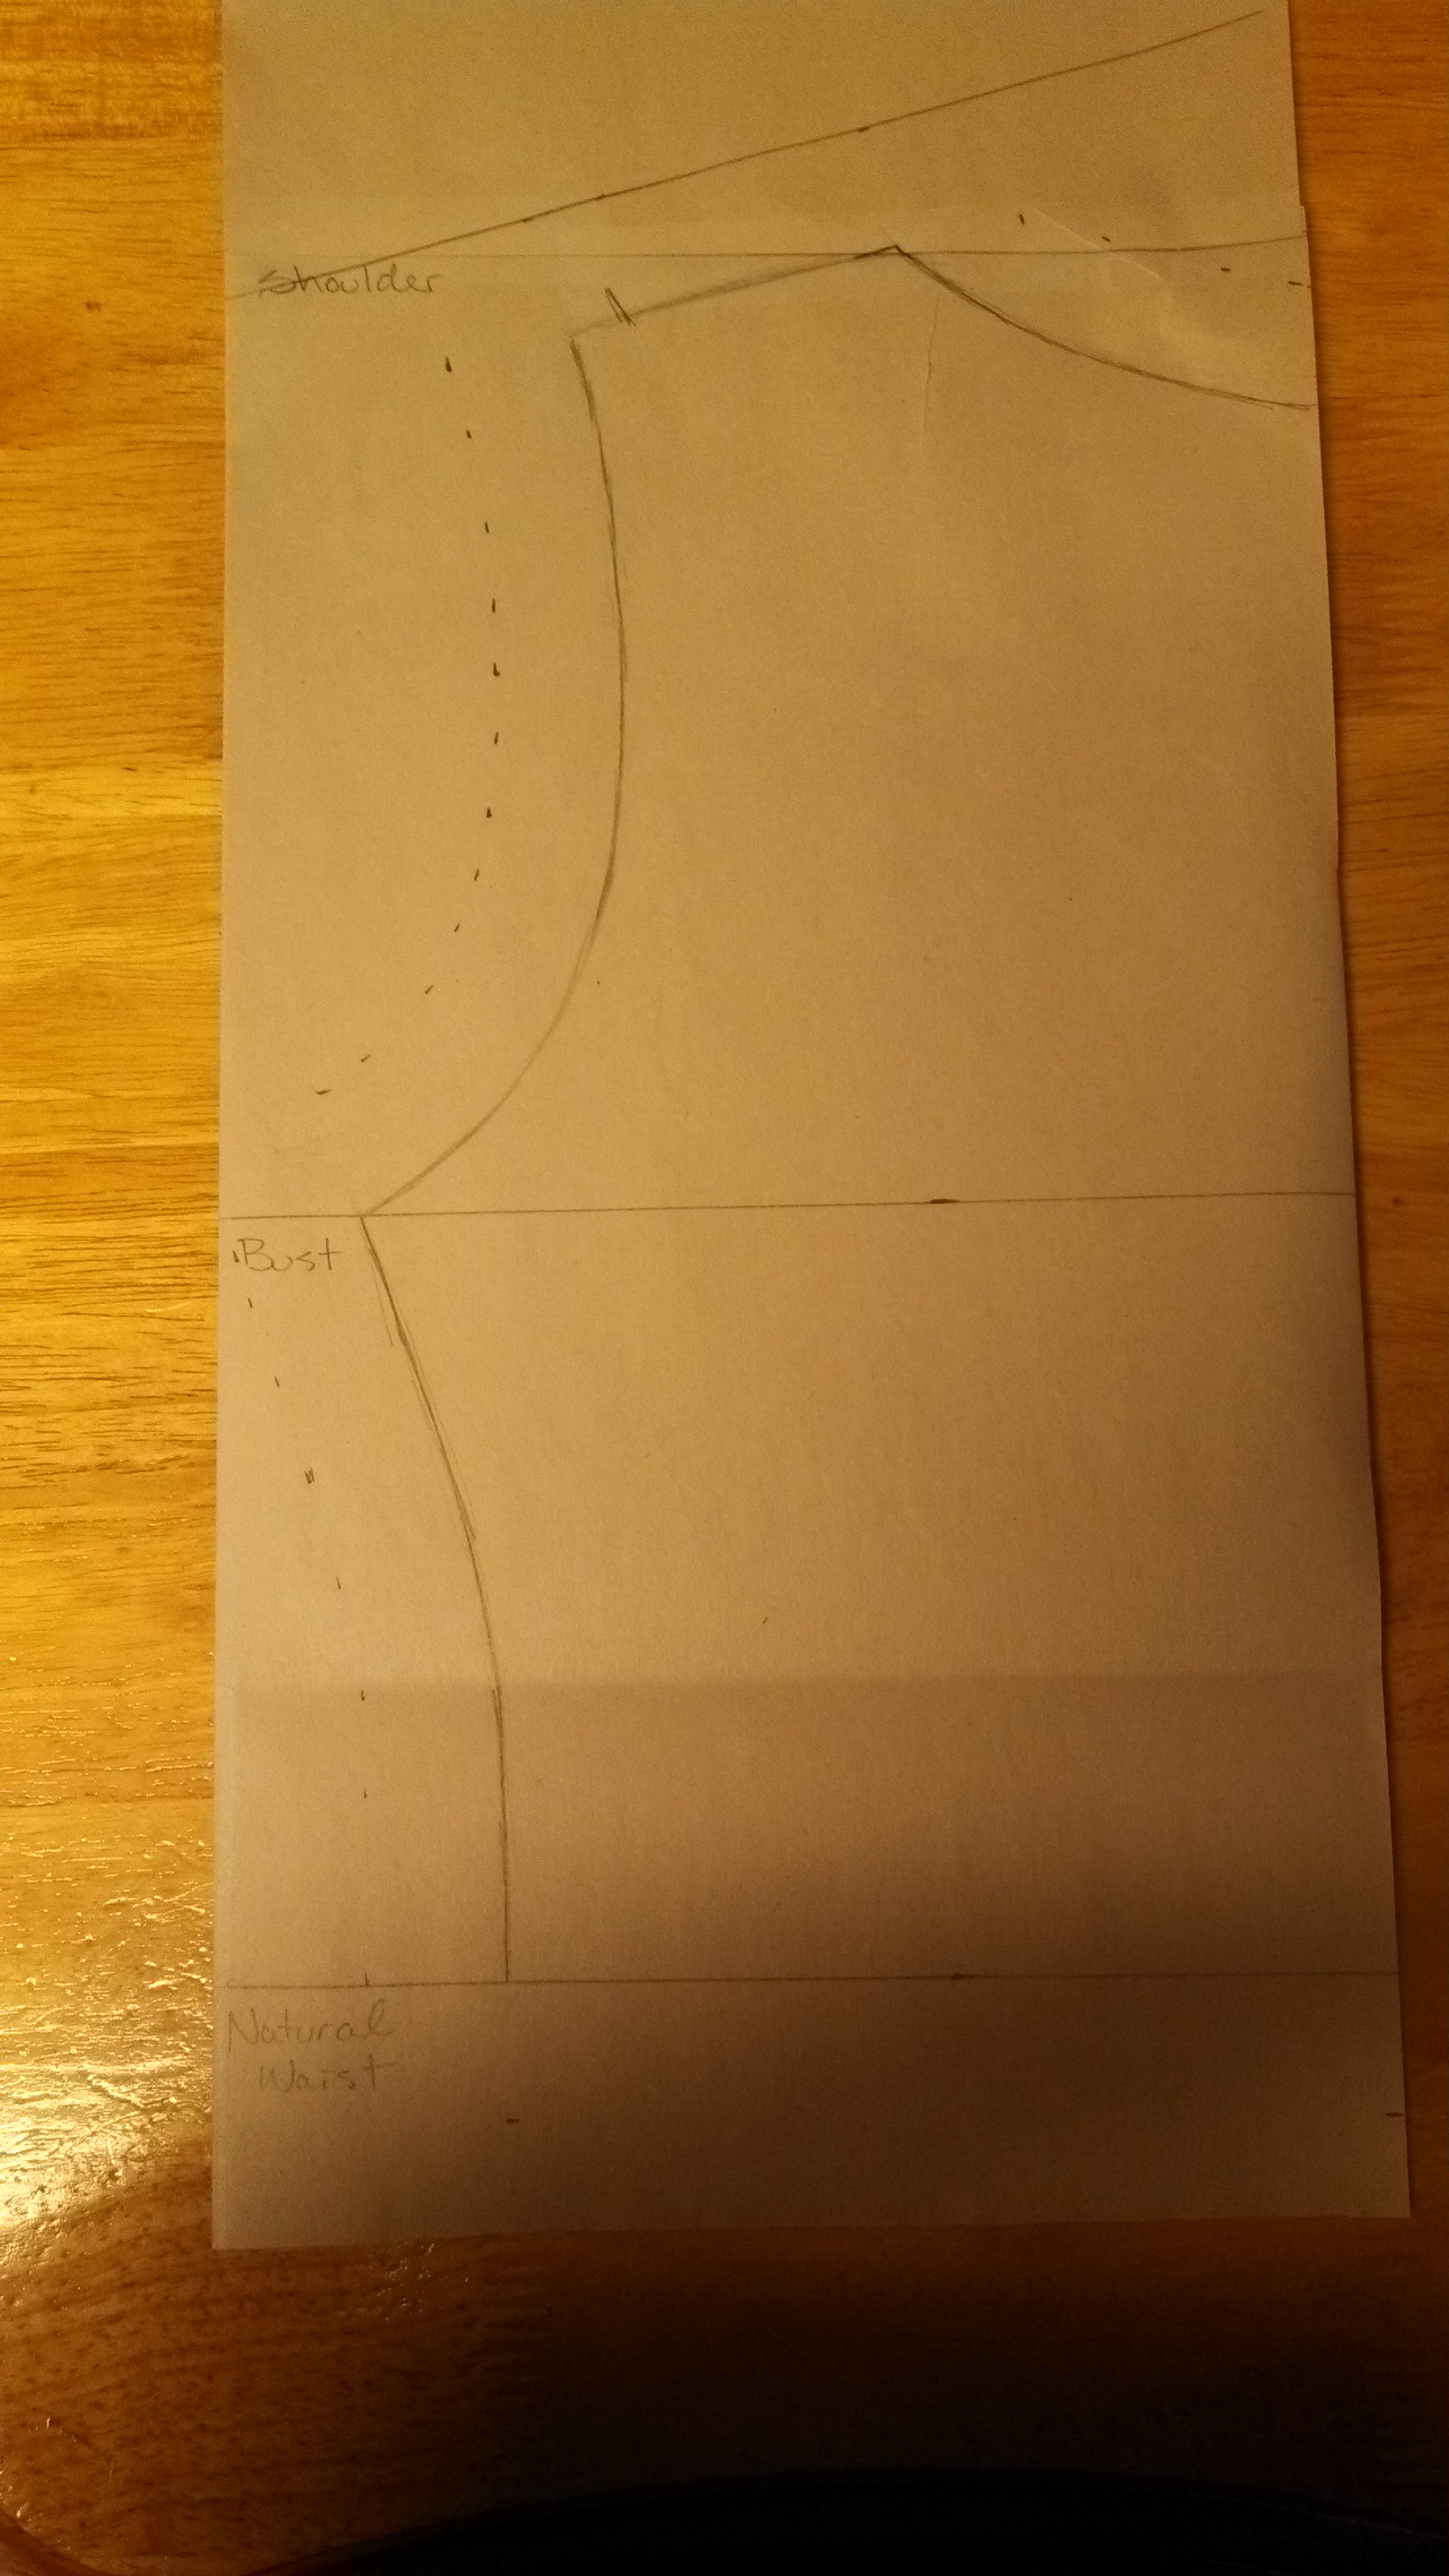
Add a seam allowance to your pattern the whole way around by laying a ruler on your lines and making a series of marks an inch away. Why a whole inch, you ask? Well, because I have a history of screwing up and I’d rather have too much fabric than not enough. You can always take fabric away but you can’t put it back!
Connect the marks to create your seam allowance outline.
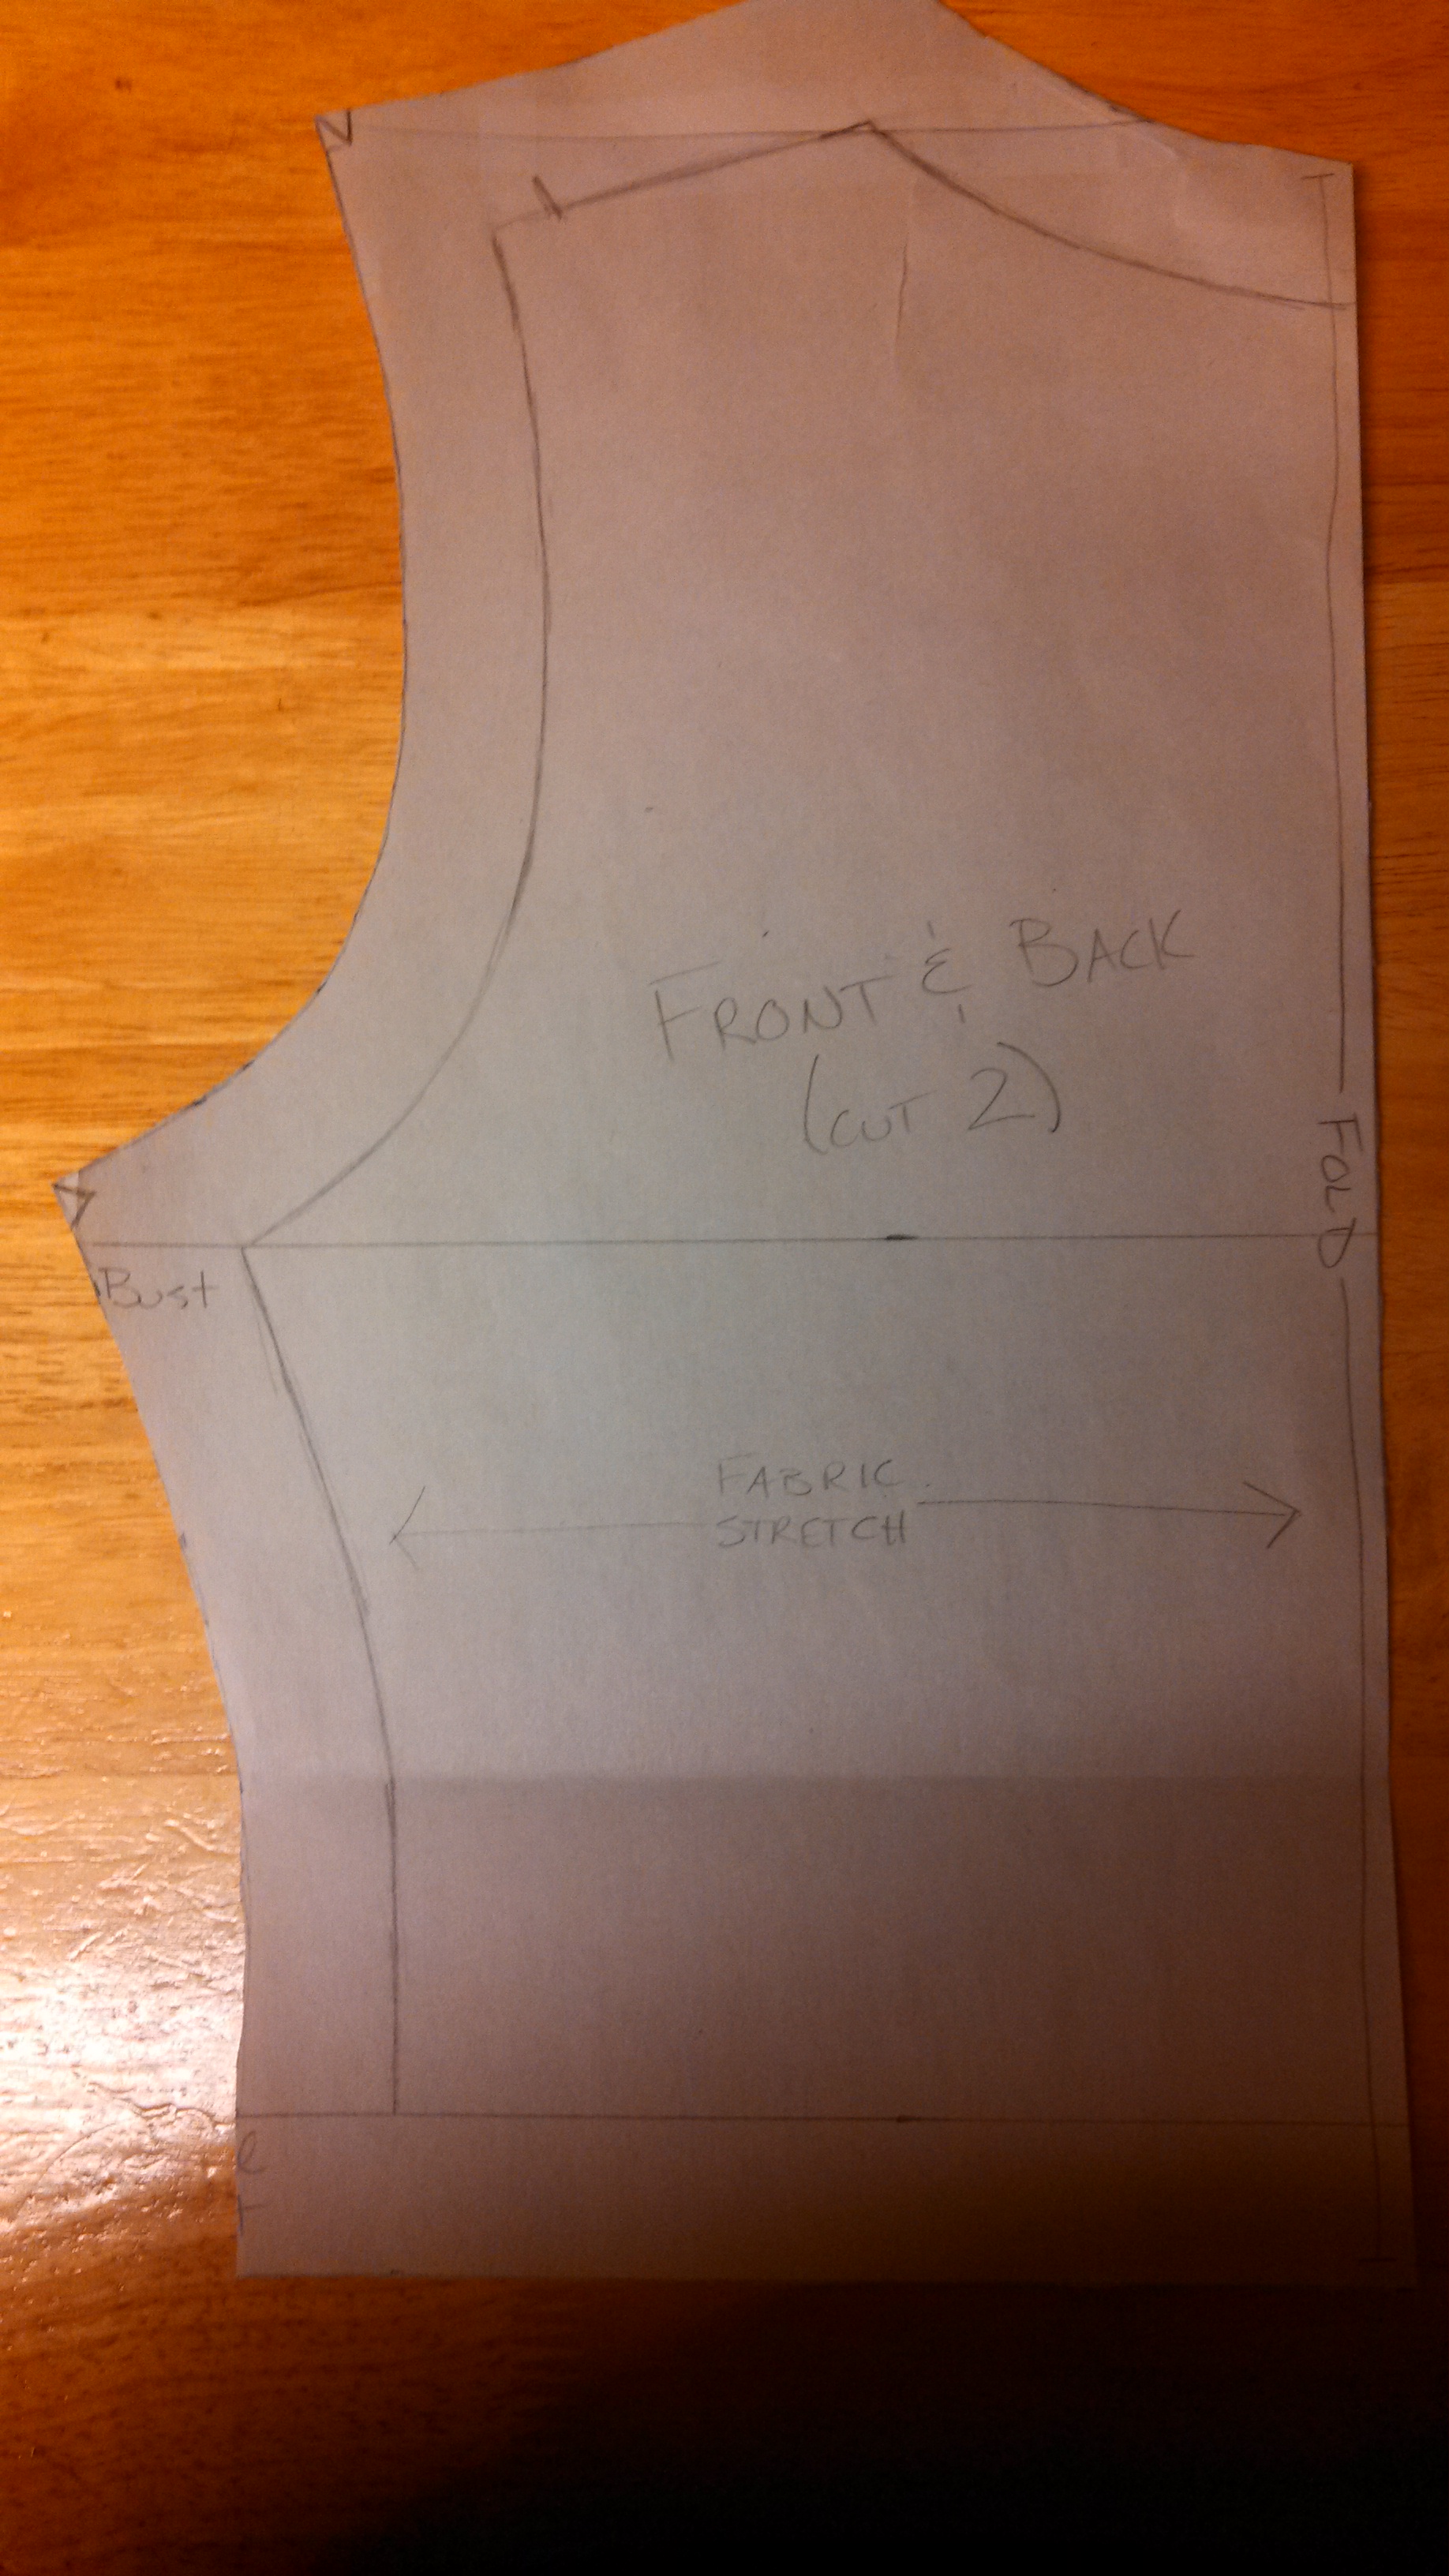
Cut it out and mark the pattern. Be sure to note that the stretch of the fabric should be perpendicular to the fold.
2b. Sleeve
My process for the sleeve pattern is a little weird. I tried a couple different methods and couldn’t quite get it right, so I made up my own way that seemed to work well. Sorry for the lack of photos, after I took the first few my lighting got very dim and I couldn’t get good pictures. I think the graphics are a little easier to follow anyways.
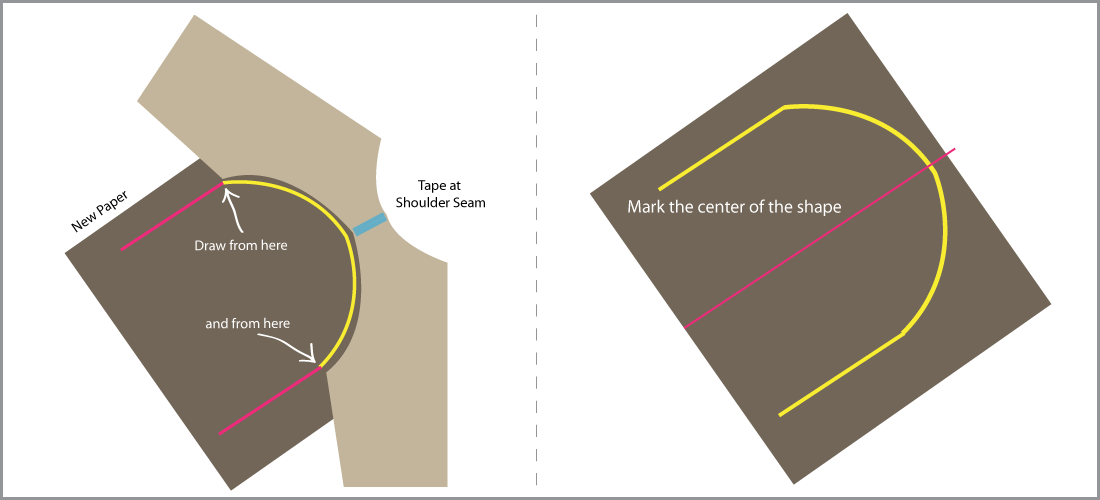
First you’ll need to cut 2 pieces of paper from your bodice pattern. It doesn’t have to be the whole thing, just make sure you have the armhole. Tape them together at the shoulder seam and lay them flat. Place a piece of paper under them and trace the shape of the open armhole. Place a mark at the corners of both sides.
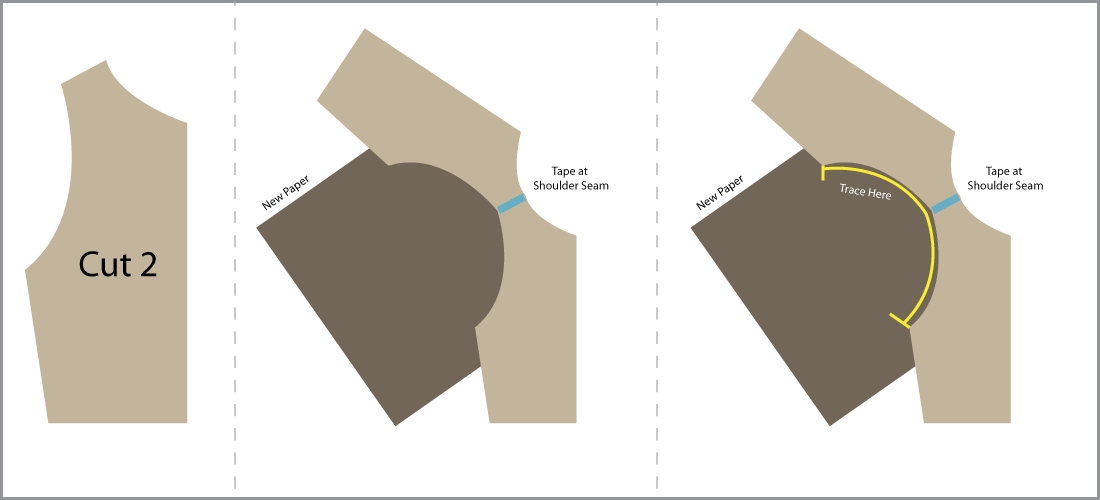
Draw a line straight out from either mark so that you’re left with a rectangle with a curve on one end. Find the center of the shape width wise and divide it in half.
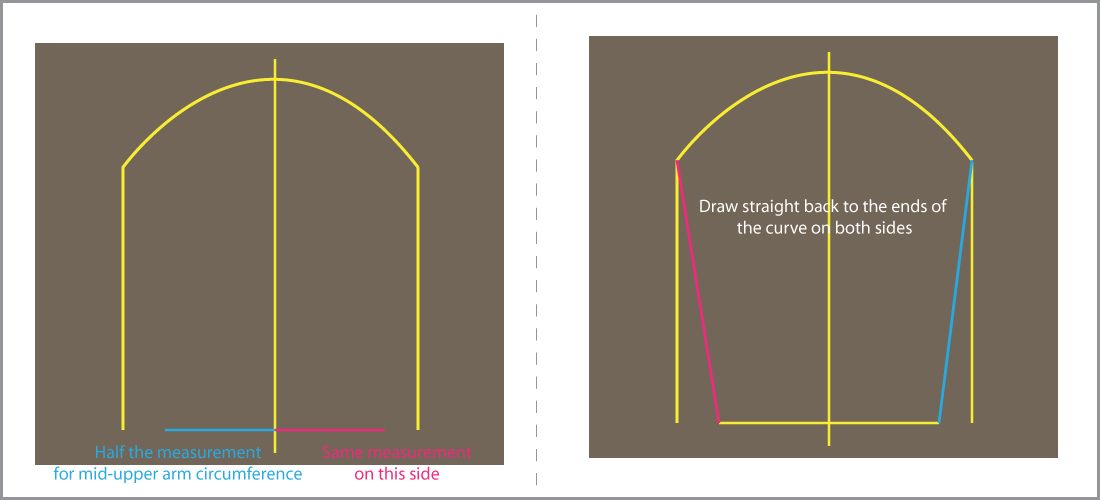
Use your Shoulder to Mid-Upper arm measurement to determine the length of the sleeve and close off the rectangle at that point. You can adjust this measurement for whatever sleeve type you want. If you want a tank dress, you won’t need to make the sleeve pattern at all. You can also add a taper to the sleeve by marking the Mid-Upper Arm measurement on the flat side of the sleeve and connecting that mark to the end of the curve. Take half of the Mid-Upper Arm Circumference and mark from the center line out to the sides in both directions. Where these lines stop is where you will trace back to the curve to create your taper.
Add a 1 inch seam allowance around the entire sleeve like you did for the bodice. Cut it out and fold the sleeve in half long ways.
2c. Skirt
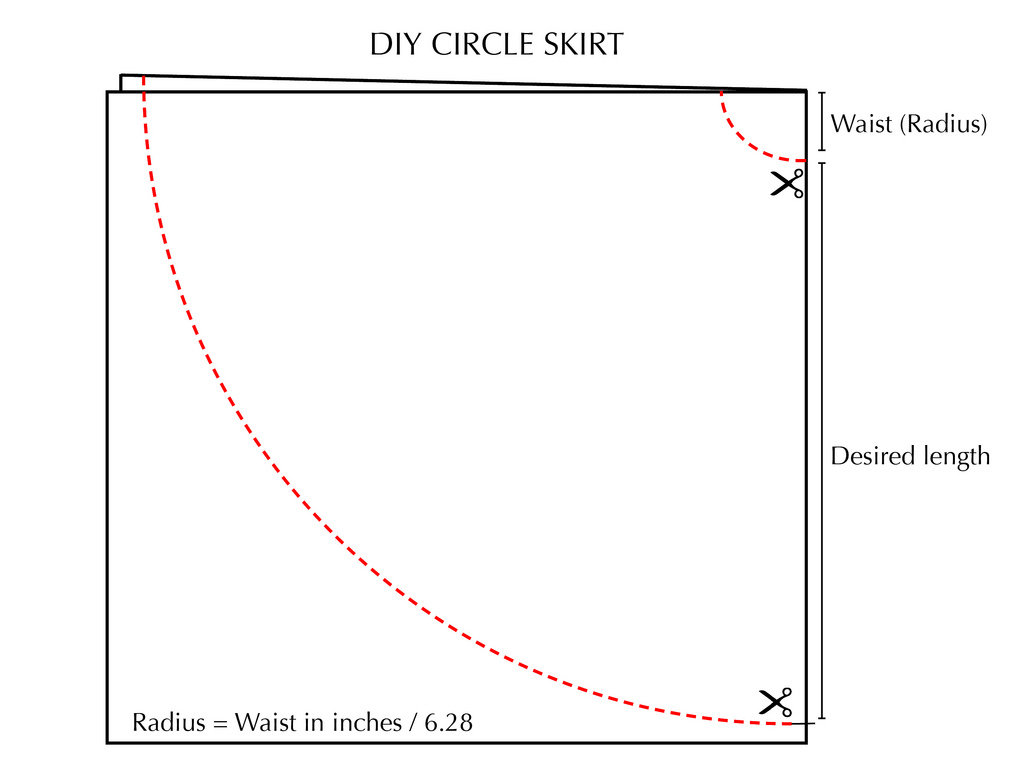
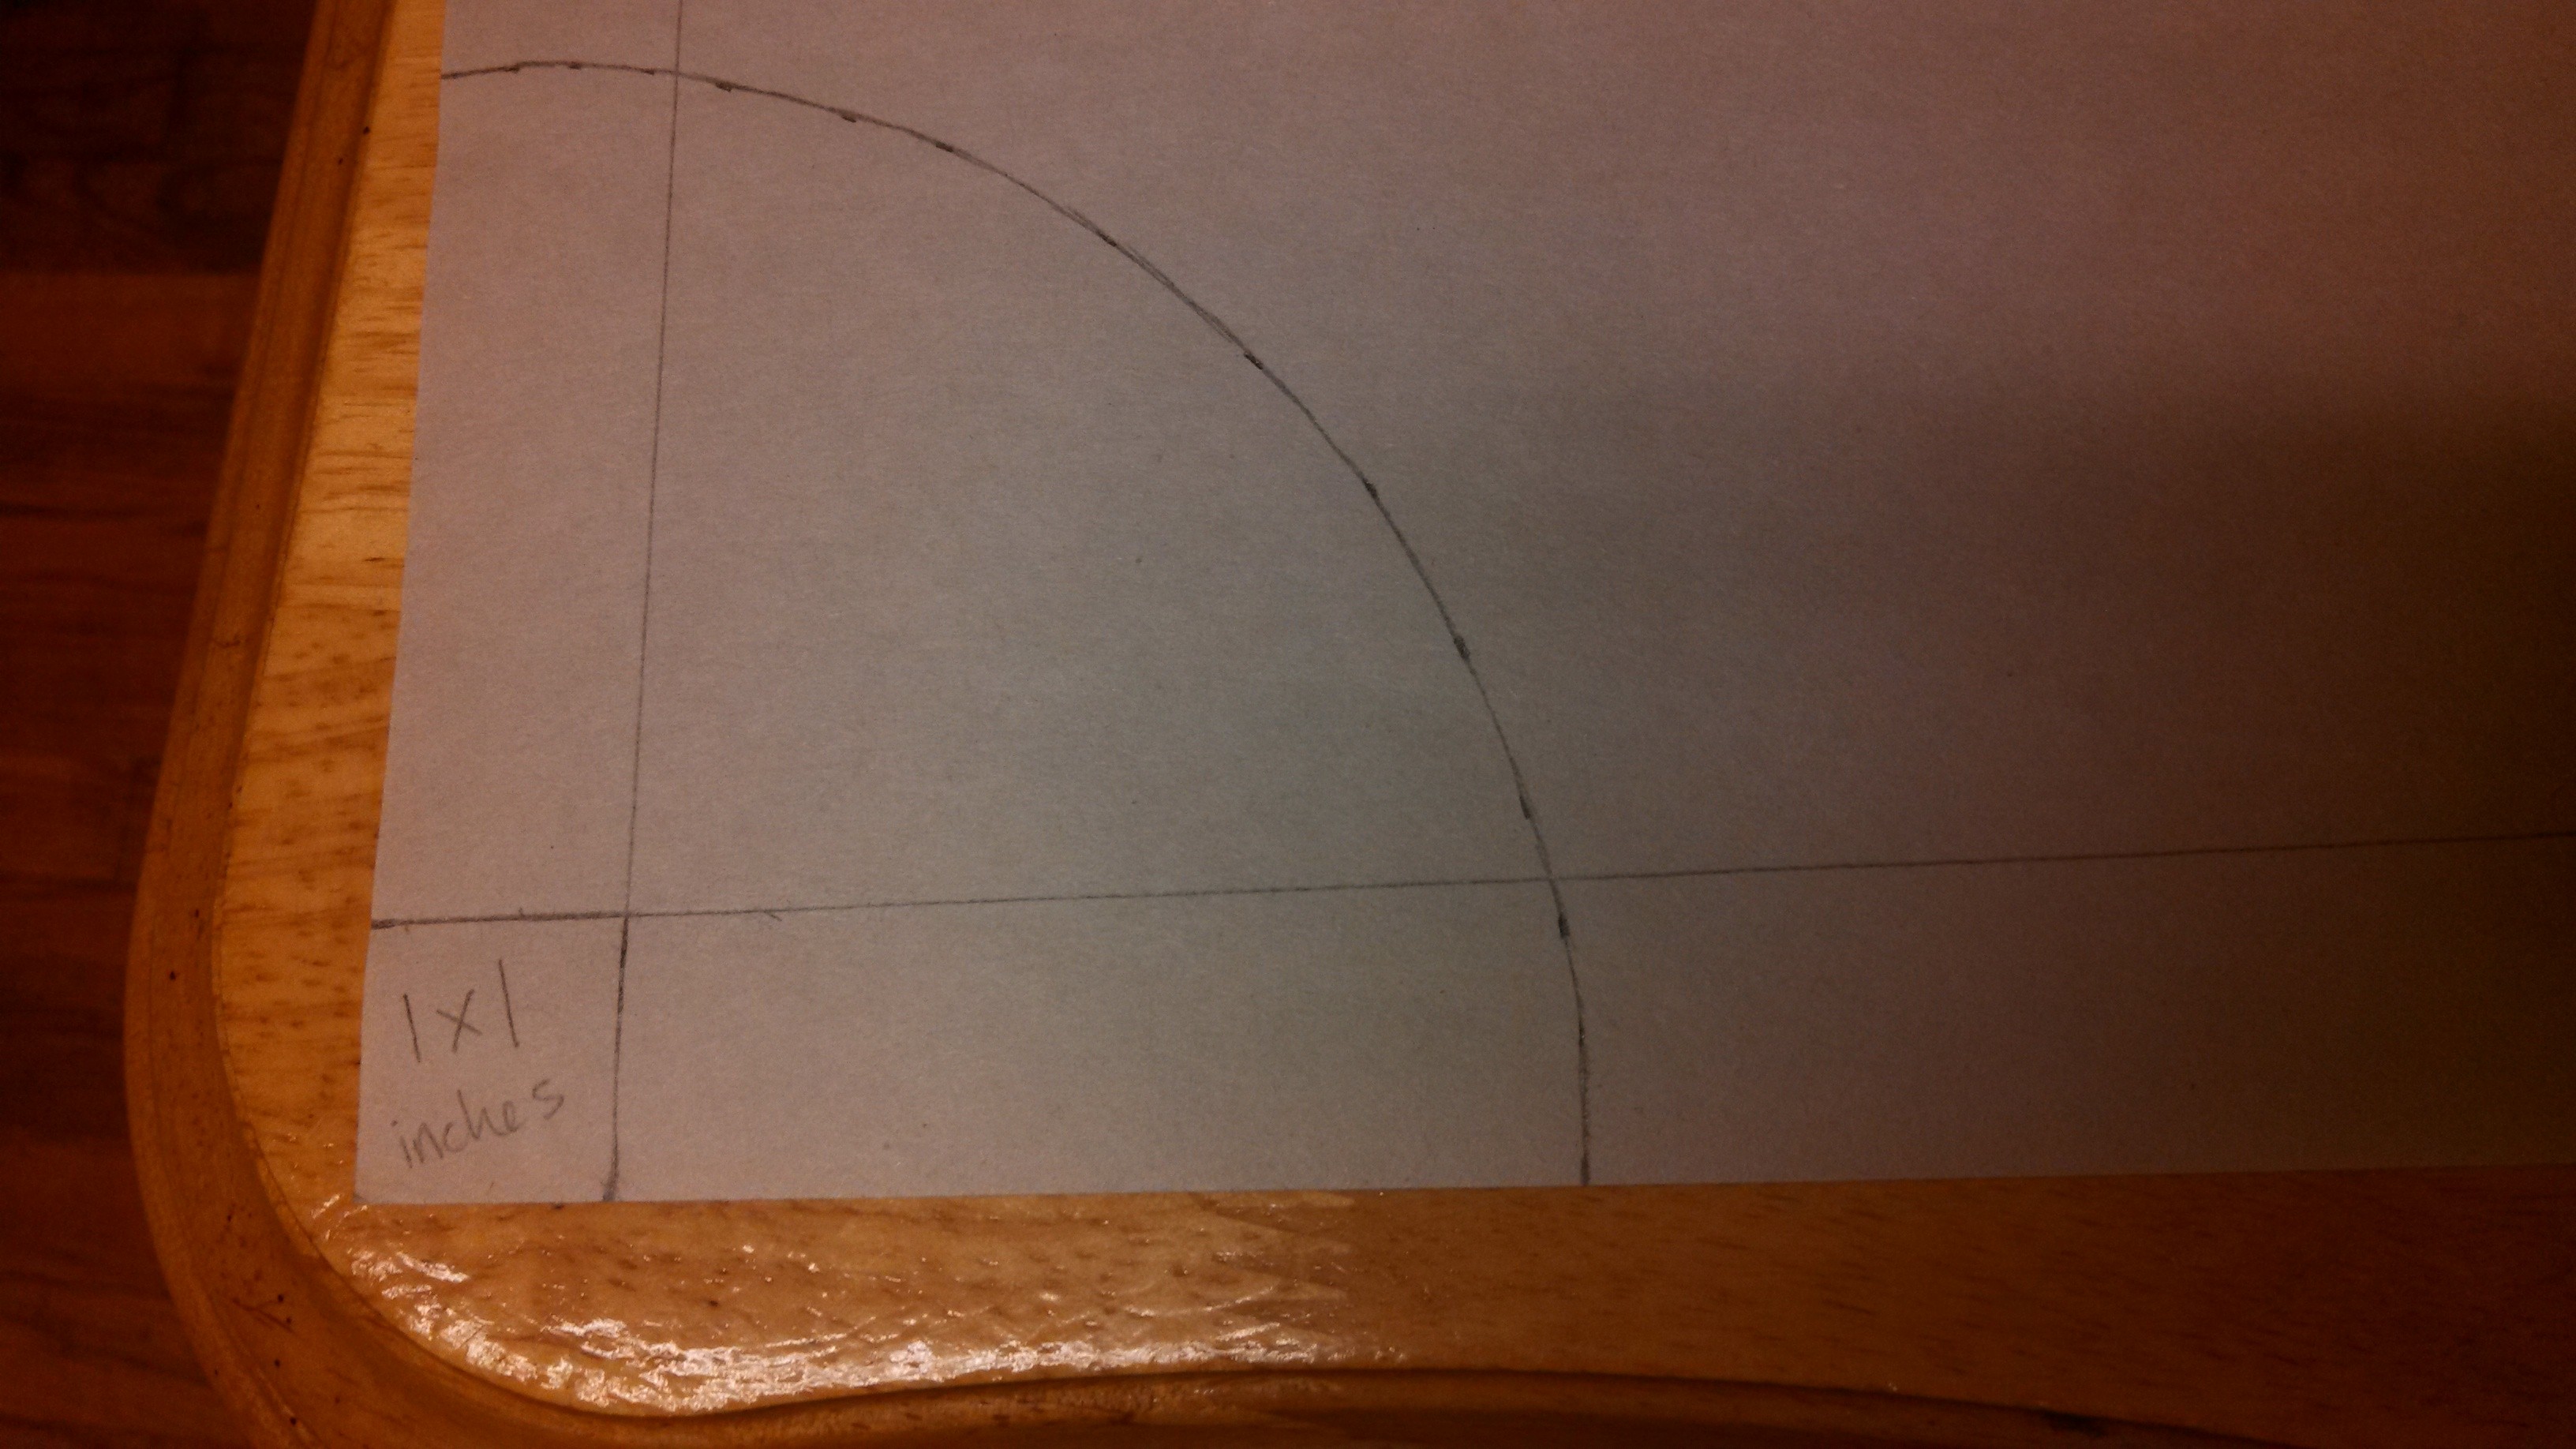
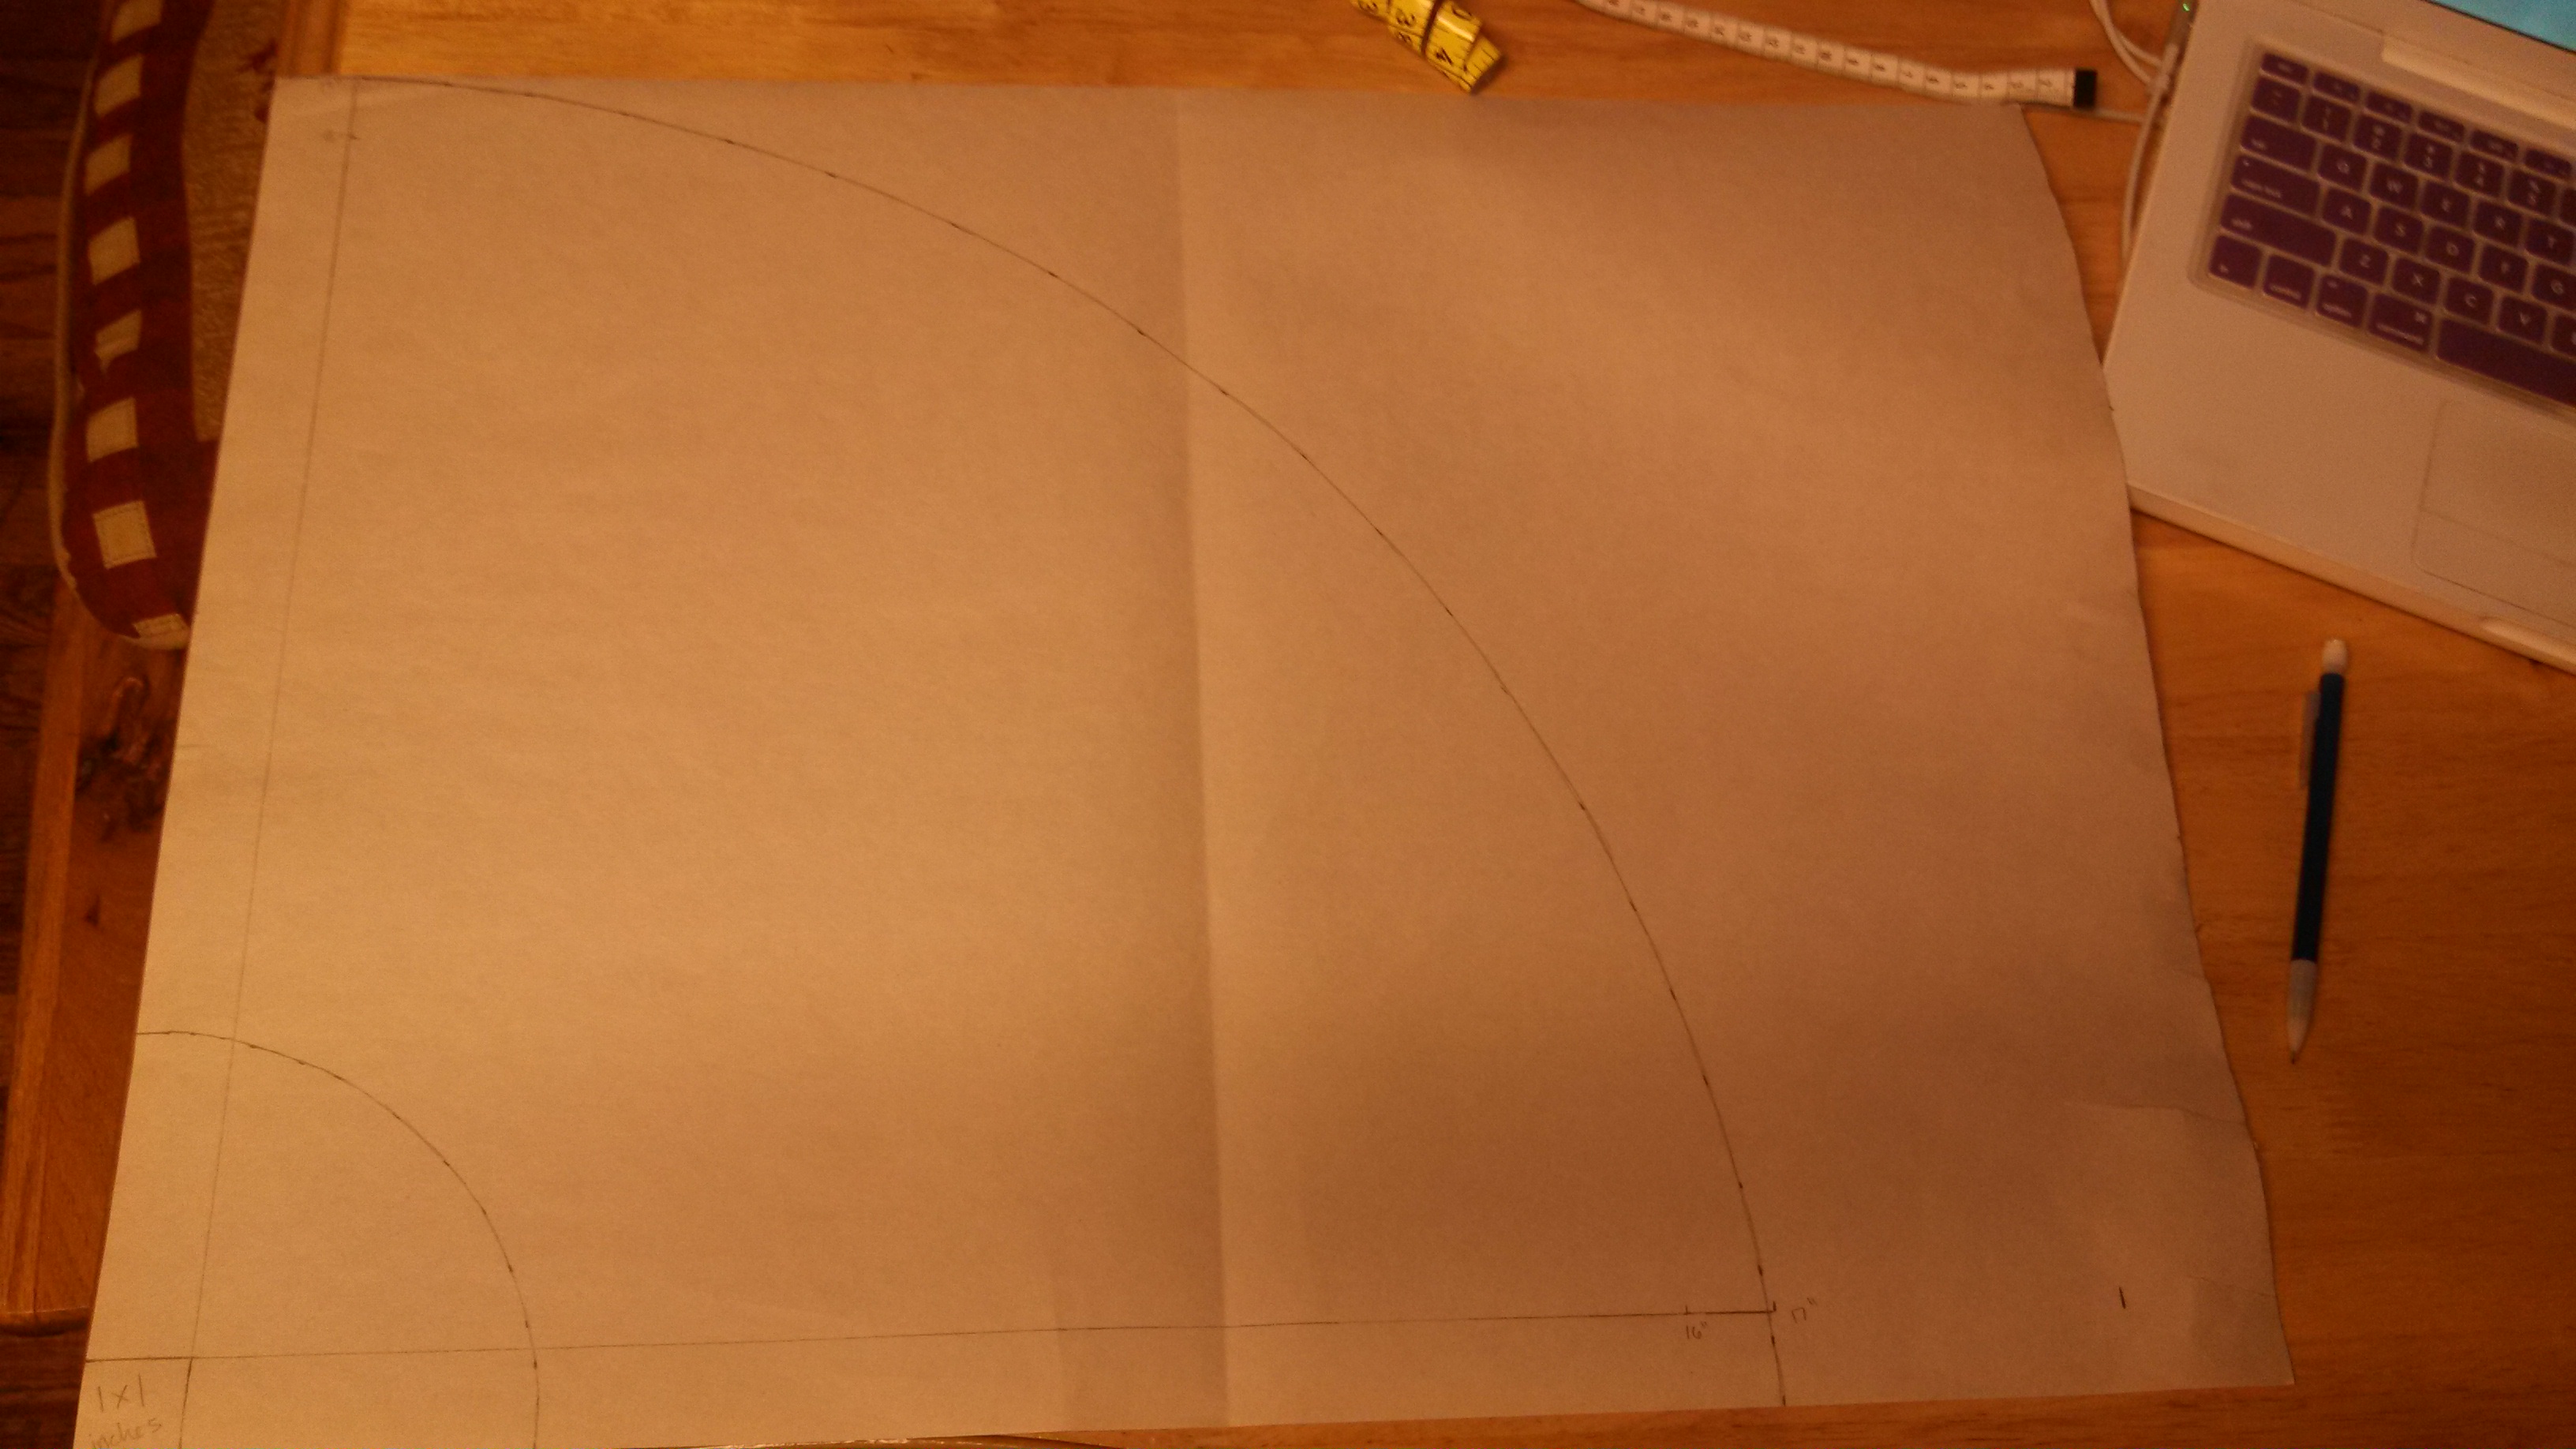
After much research, confusion, and frustration I think have come to understand how to make circle skirt. I found this wonderful diagram, to your left, on Google and it does a pretty good job of explaining what measurements you need.
*Before you begin, please note that the measurements in my example images are very WRONG. My skirt pattern is way too short and I will be drafting a new one for the next part of the tutorial. Please make sure you have enough paper to accommodate your skirt length, as this is the largest pattern piece you will have.*
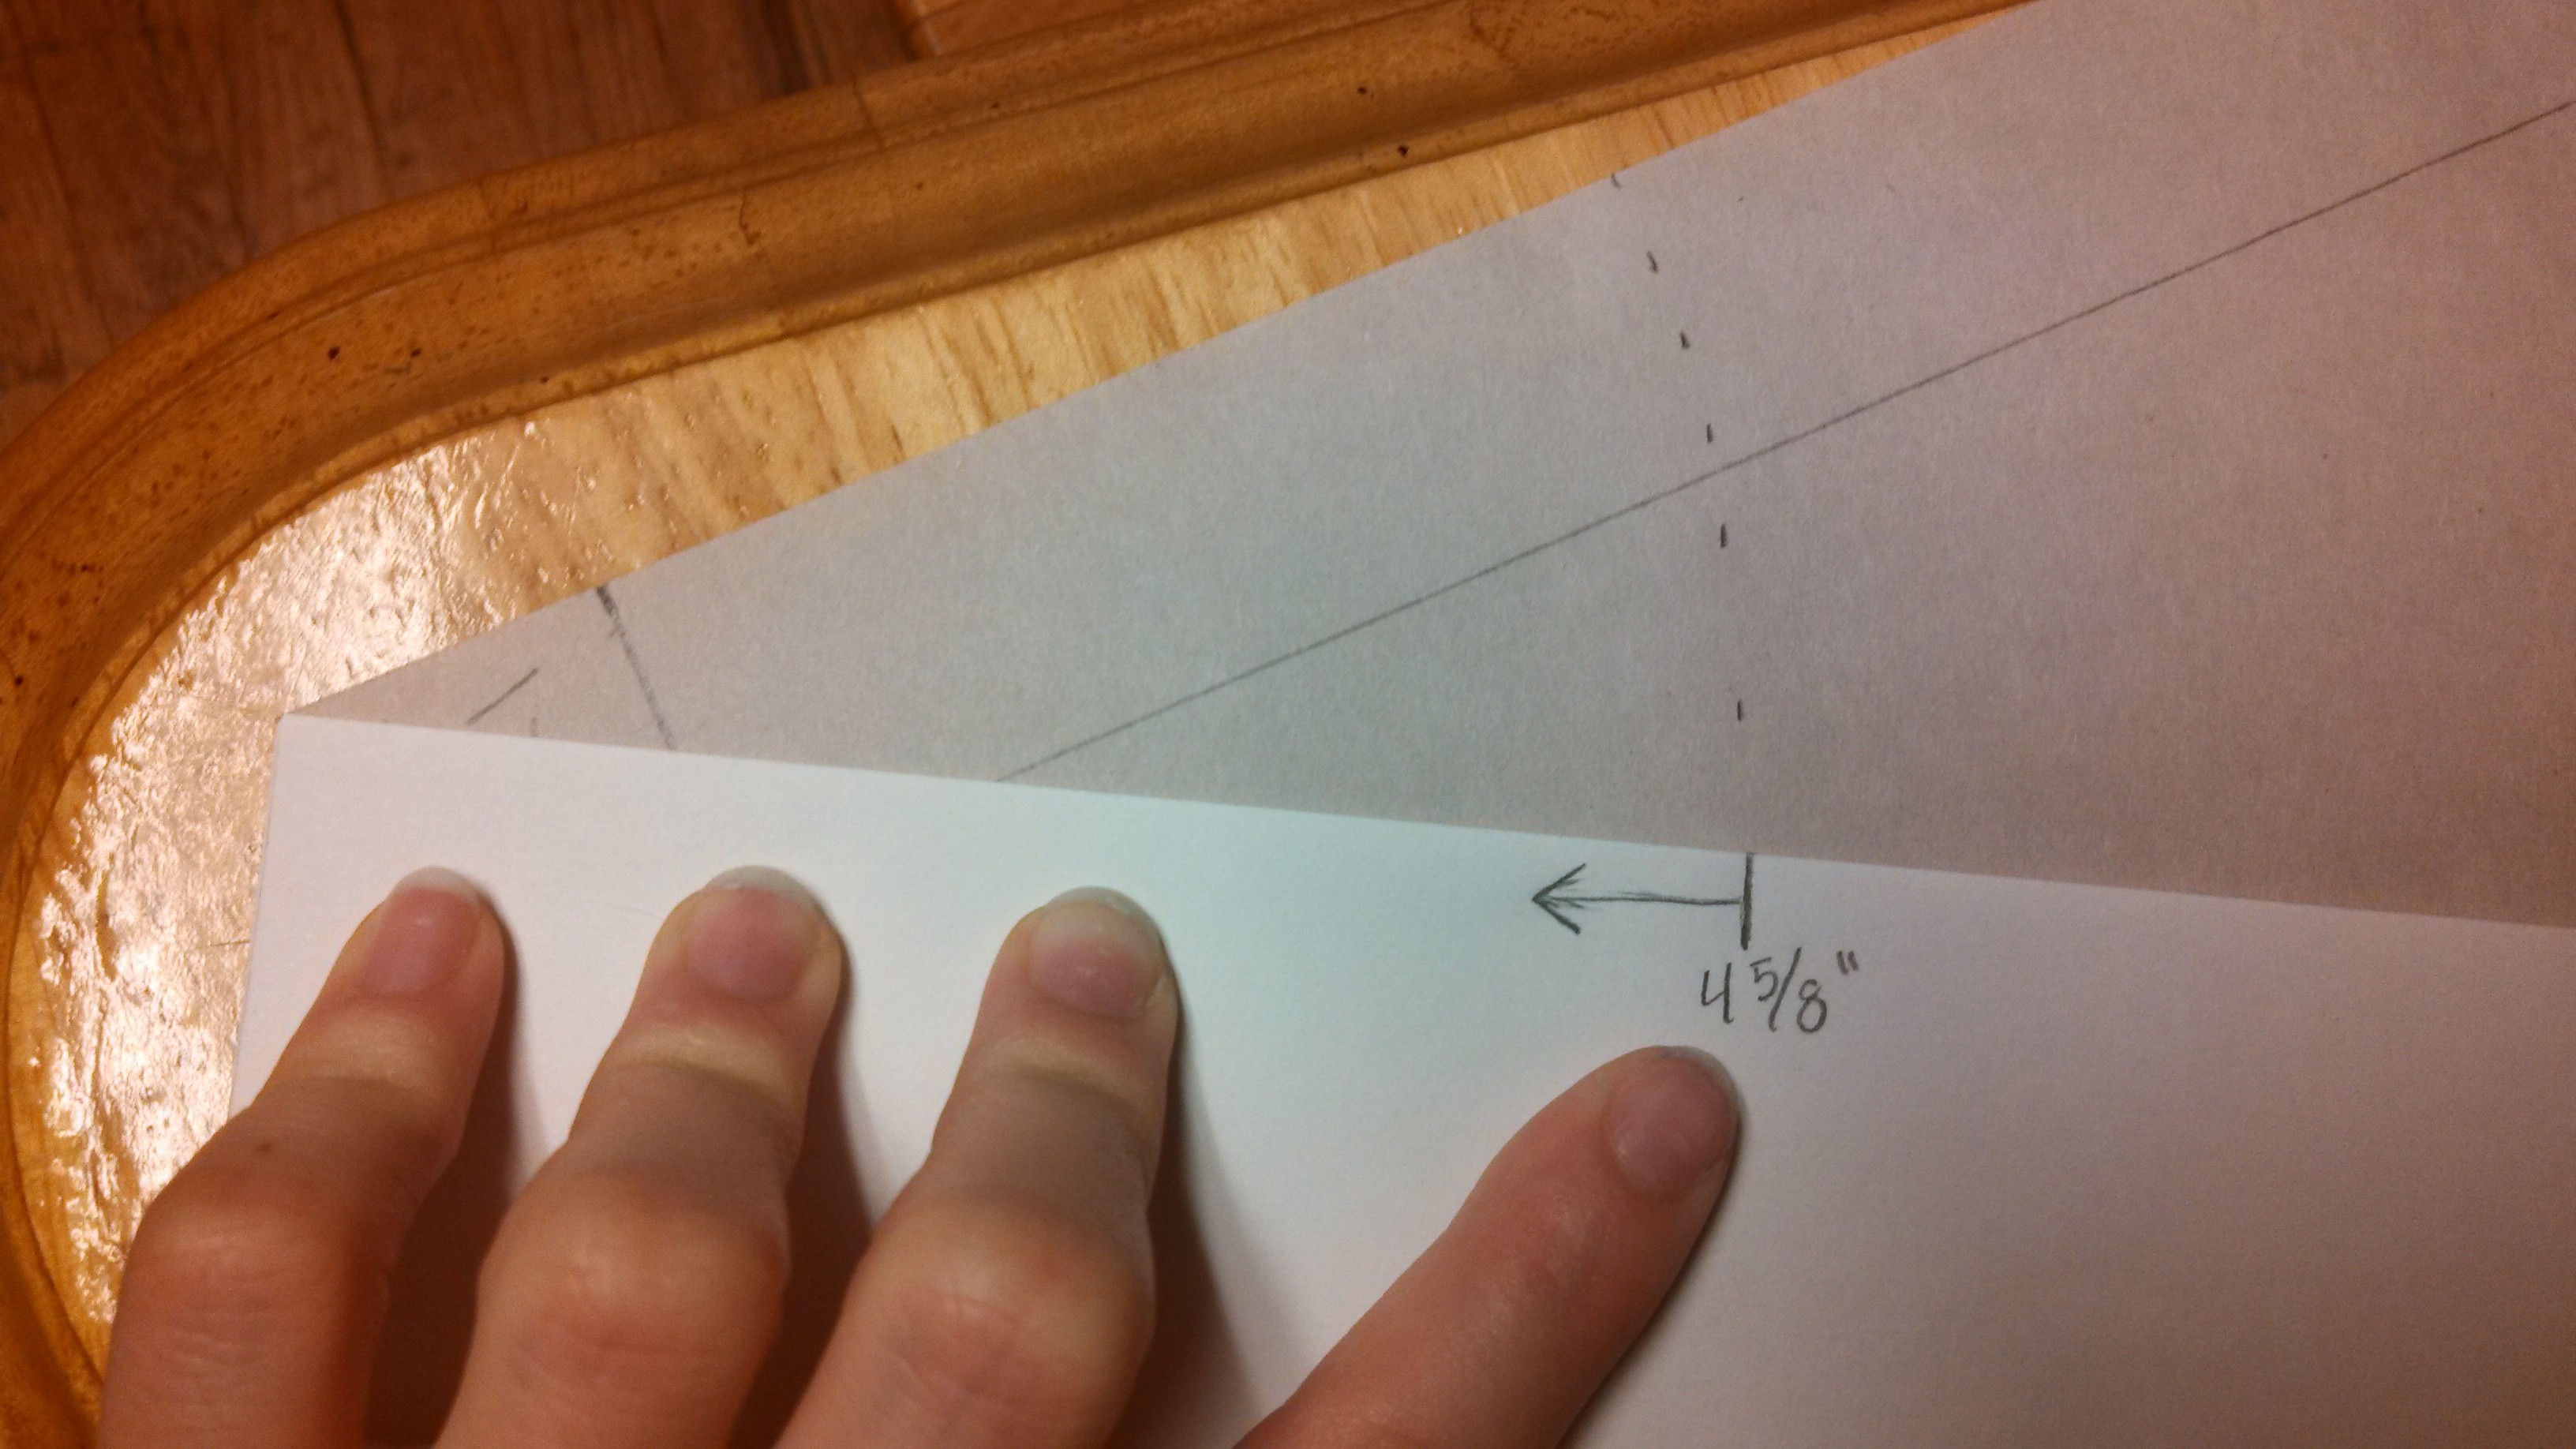
Back up at your skirt waist, use a ruler to make a series of marks from the corner of the “L” out into a cone shape. The marks should be made at the length of your waist radius measurement from the corner. This will make sure that you include the 1 inch seam allowance without having to make another dotted line.
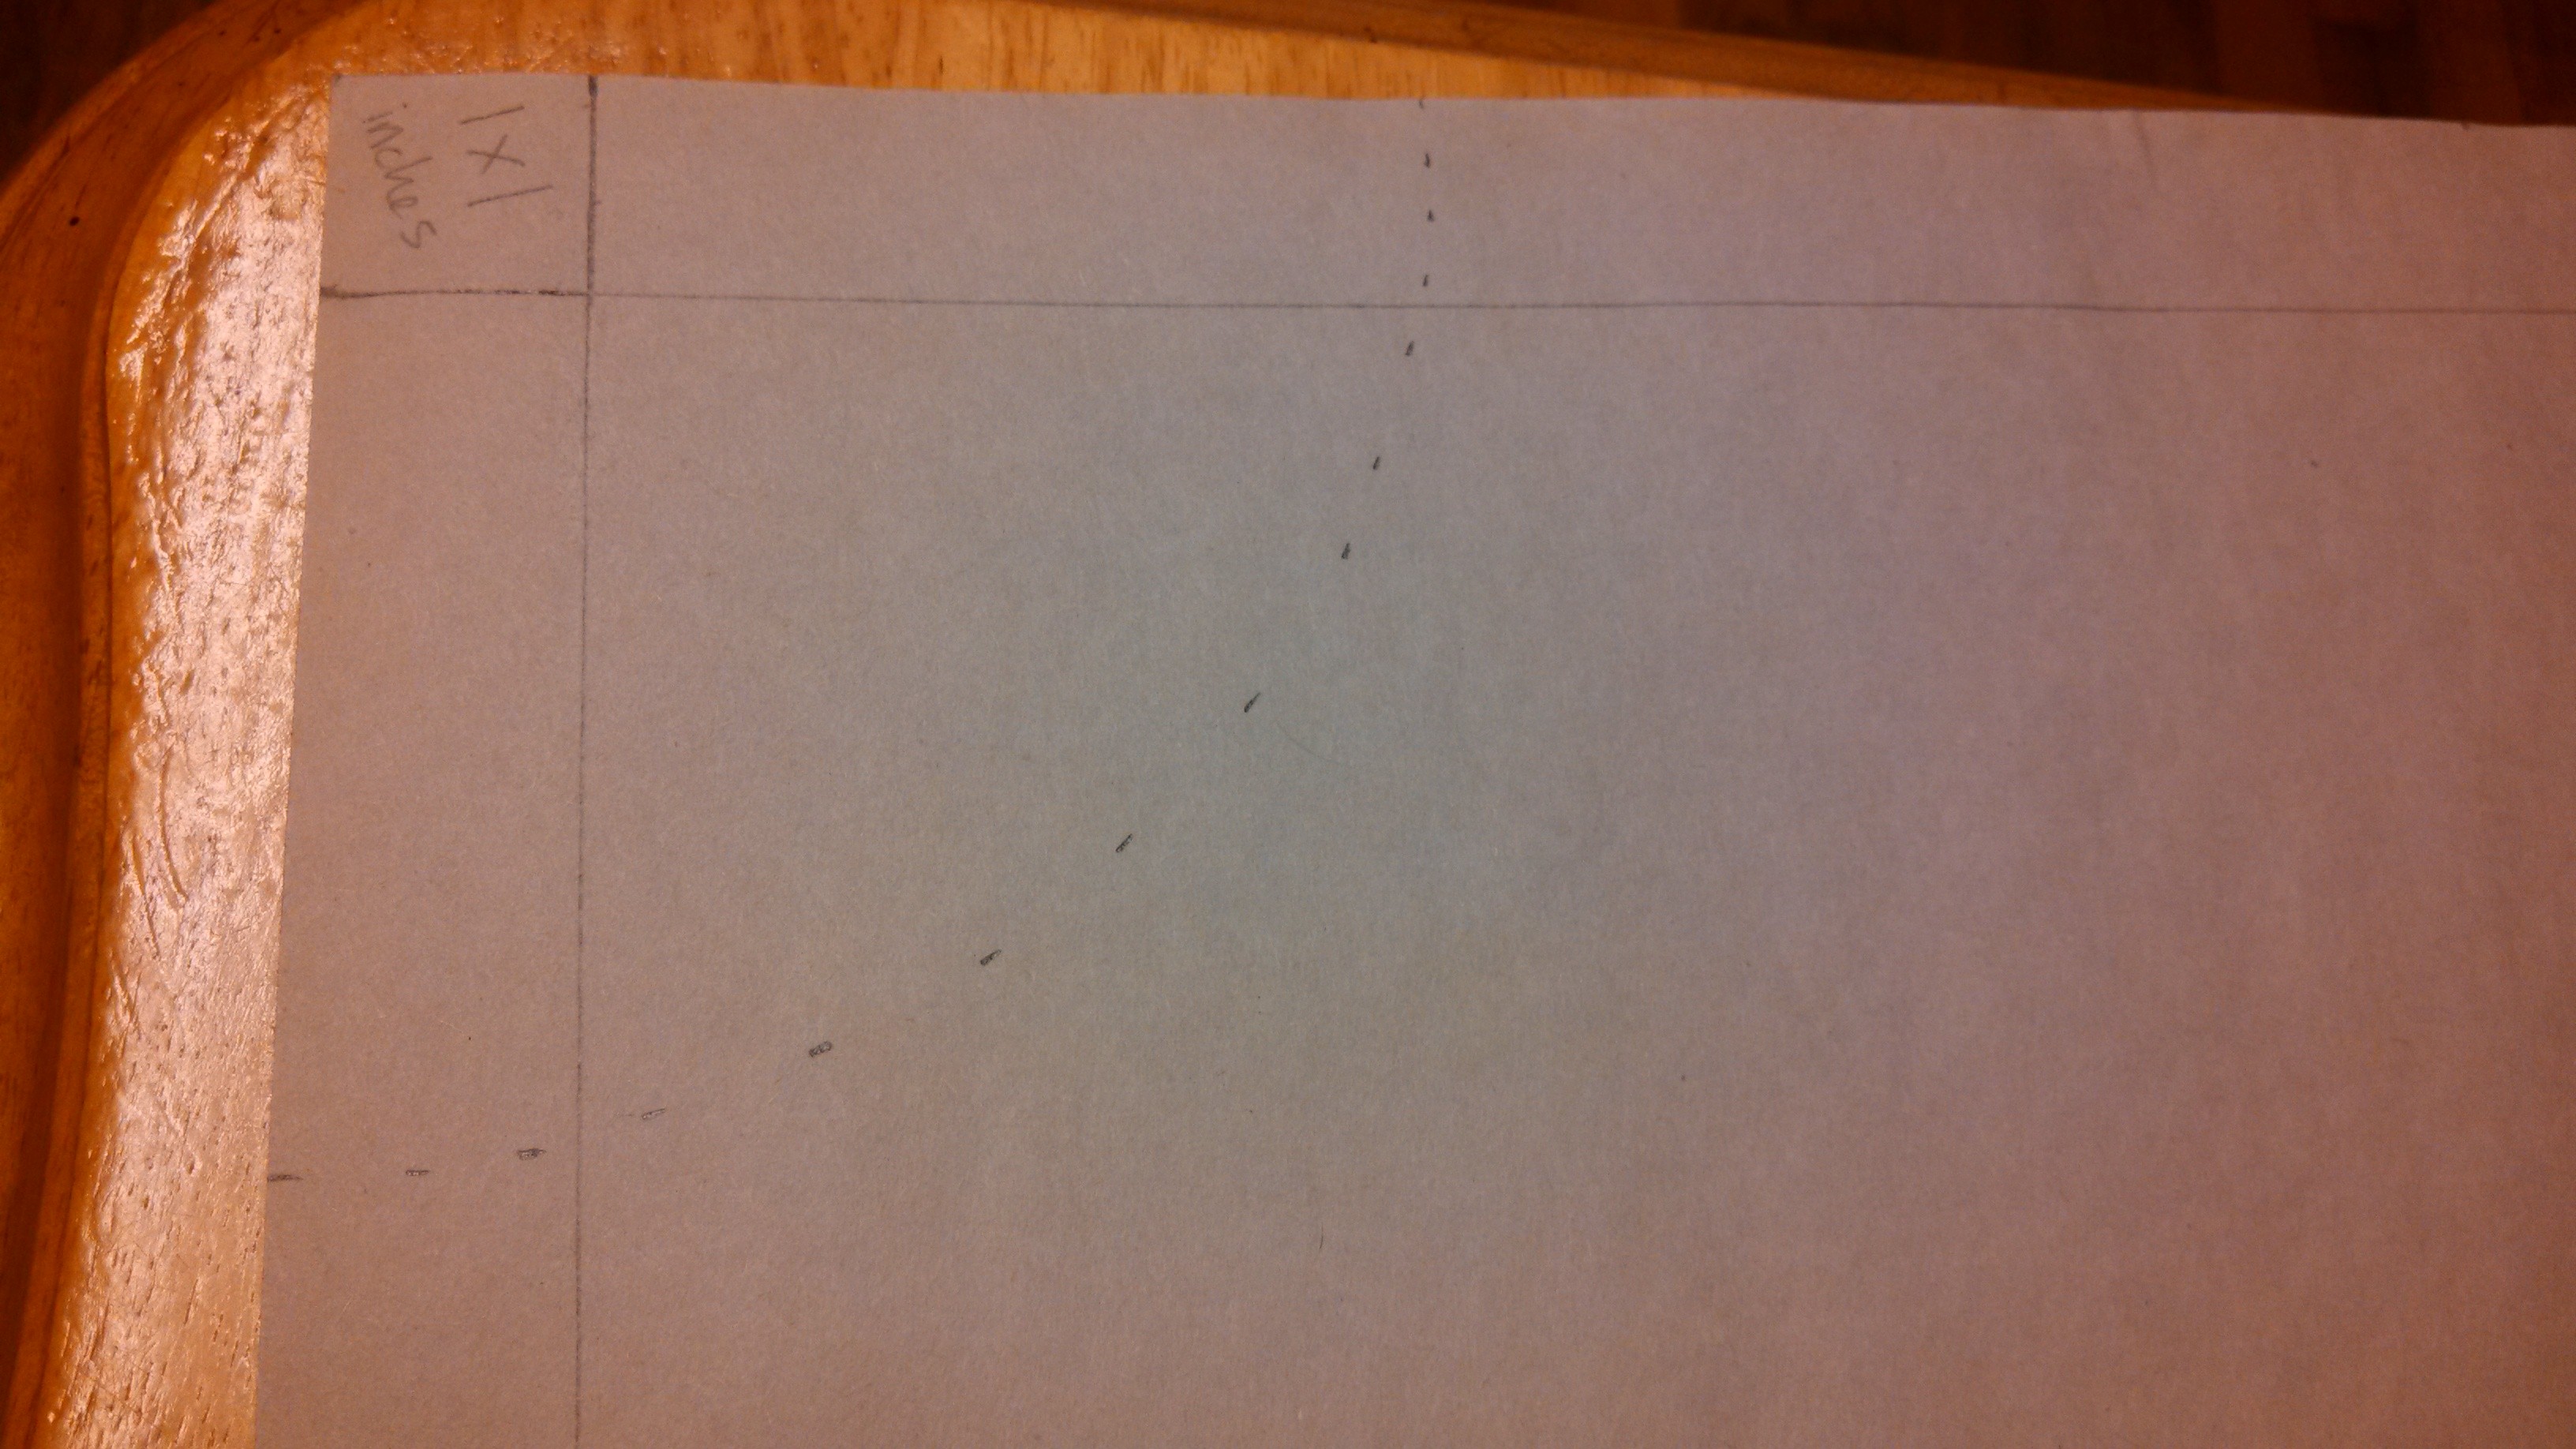
Your seam allowance is already counted into this piece because of the way it was marked. There’s no need to add a seam allowance outline.
Cut and put aside. Your skater dress pattern is done!
Helpful Resources
I had some difficulty with the skirt part of the pattern simply because I’m bad at geometry (and all math for that matter). I did find some awesome people out there, however, that have done this before and explained it super-duper well. If you got confused by my terrible explanation of it, go visit these lovely tutorials for assistance:
- Circle Skirt Tutorial on Vintage Zest
- Circle Skirt Tutorial on Style & Spice
- Super In-Depth Circle Skirt Tutorial Video
- Another Awesome Video Tutorial
There’s also this neat little tutorial I found that’s a similar method to mine for creating the bodice.
Did you have any issues with creating your skater dress pattern? If so, feel free to leave me a comment below or send me a message directly here. I’d be happy to help you with any issues or questions you might have!
Continue Reading for Part 2!! —>
